> ## Documentation Index
> Fetch the complete documentation index at: https://docs.agent.ai/llms.txt
> Use this file to discover all available pages before exploring further.
# MCP Server
> Connect Agent.ai tools to ChatGPT, Claude, Cursor, and other AI assistants.
## **Connect Agent.ai to Your AI Assistant**
> Use your Agent.ai tools with ChatGPT, Claude, Cursor, and other MCP-compatible applications
## What is MCP?
Model Context Protocol (MCP) allows AI assistants like ChatGPT and Claude to access your Agent.ai tools, agents, and actions. Once connected, you can ask your AI assistant to use any of your Agent.ai capabilities directly in conversation.
## Connection Methods
### ✨ Secure Sign-In (Recommended)
The easiest way to connect is using our secure sign-in method. Simply add Agent.ai to your AI assistant, and you'll sign in with your Agent.ai account - no API tokens needed!
**Server URL:** `https://mcp.agent.ai/mcp`
**Benefits:**
* ✅ Most secure - just sign in with your Agent.ai account
* ✅ Works with ChatGPT, Claude, Cursor, and other modern MCP clients
* ✅ No API tokens to copy or manage
* ✅ Automatic access to all your agents and tools
***
## Setup Instructions
Choose your AI assistant below for step-by-step instructions:
### Step 1: Open ChatGPT Settings
Click on your profile icon in ChatGPT and select **Settings** from the dropdown menu.
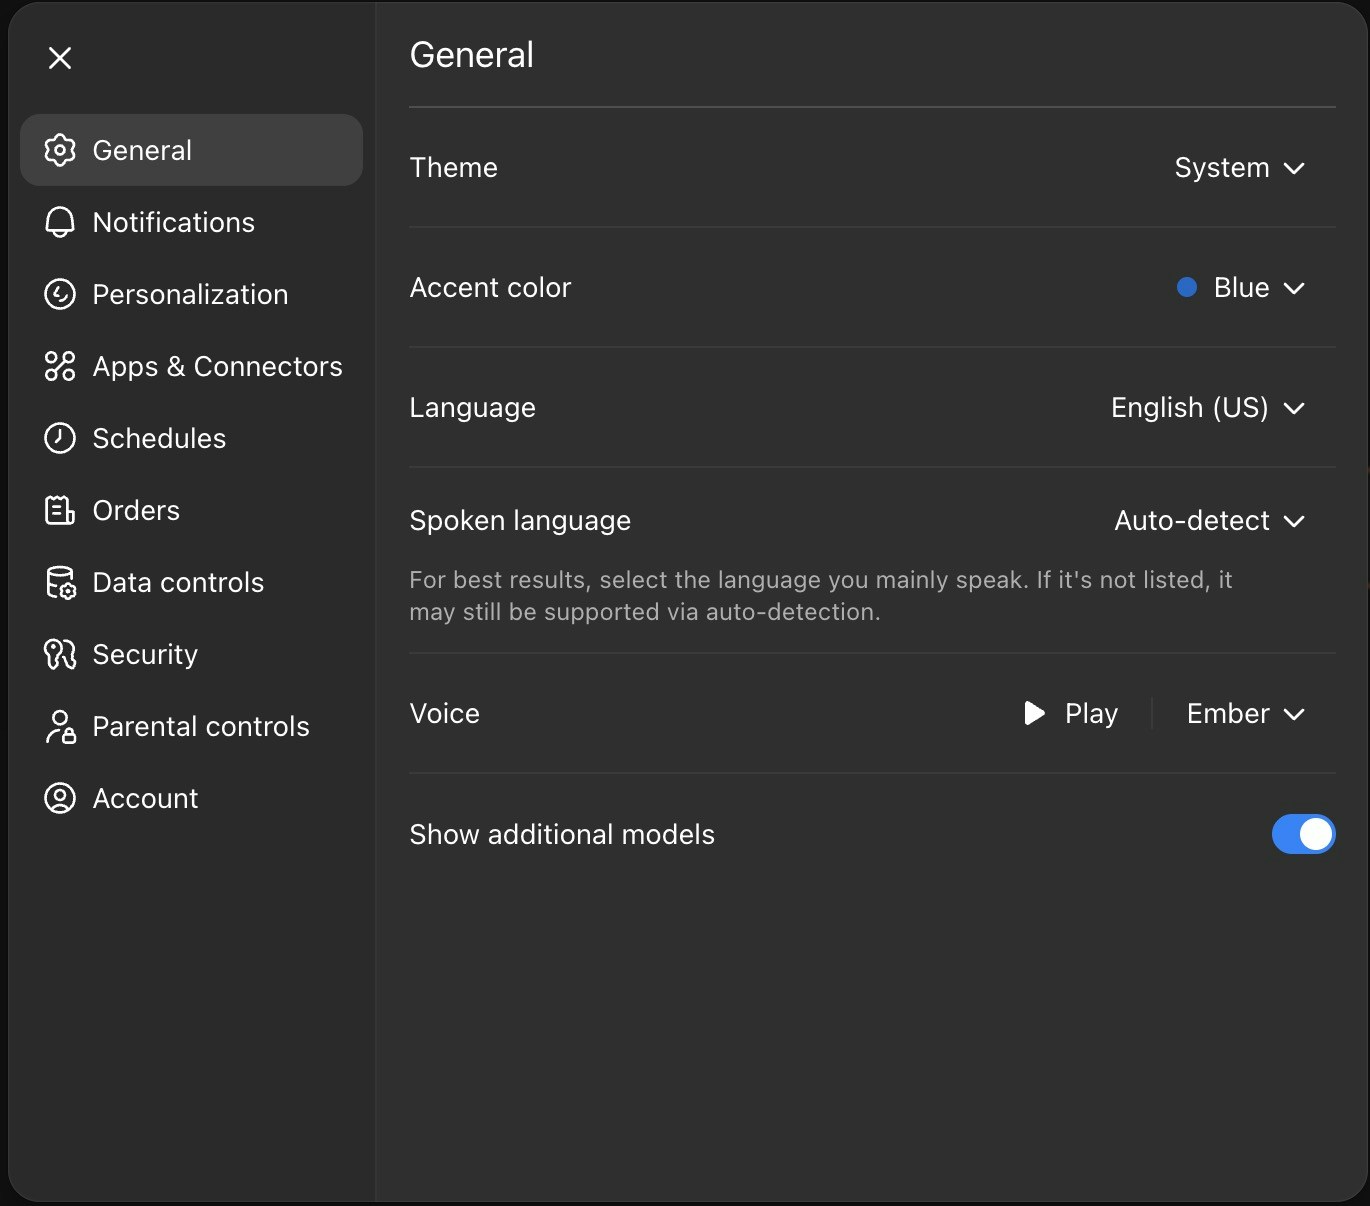 ***
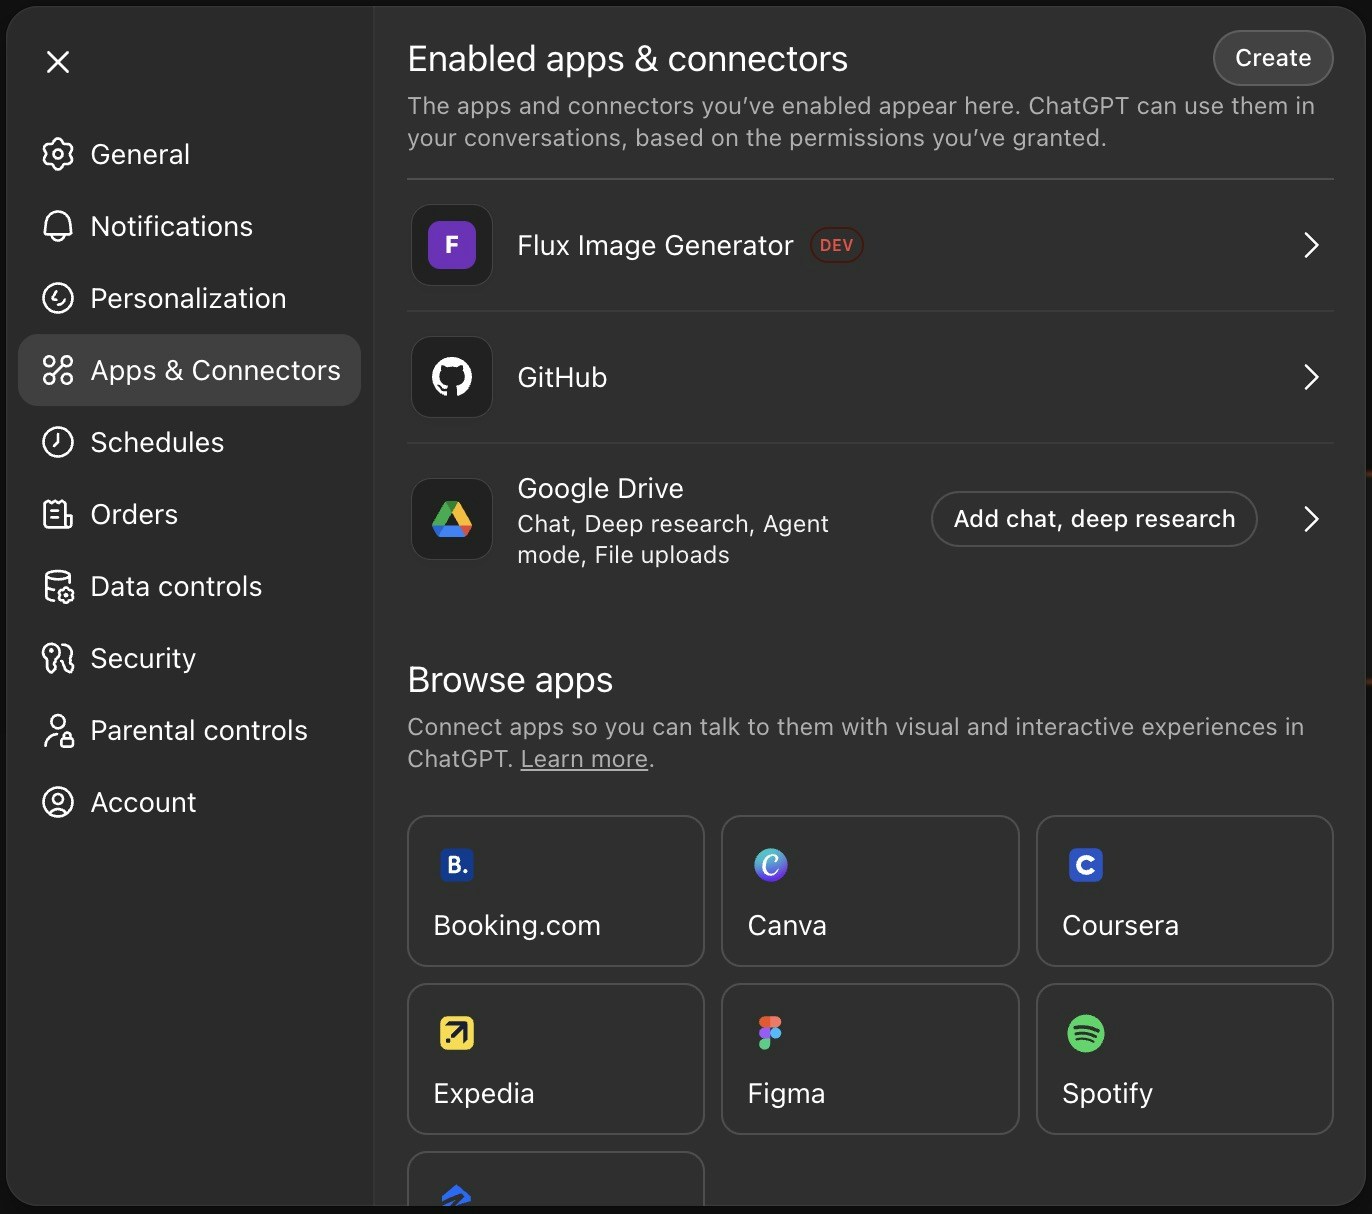
### Step 2: Navigate to Apps & Connectors
Go to the **Apps & Connectors** section and click on **Advanced Settings** to enable Developer mode.
***
### Step 2: Navigate to Apps & Connectors
Go to the **Apps & Connectors** section and click on **Advanced Settings** to enable Developer mode.
 ***
### Step 3: Enable Developer Mode
Toggle on Developer mode to access connector features.
***
### Step 3: Enable Developer Mode
Toggle on Developer mode to access connector features.
 ***
### Step 4: Create New Connector
Once in Developer Mode, click **Create (new connector)** in the top right of the "Apps and Connectors" section.
***
### Step 4: Create New Connector
Once in Developer Mode, click **Create (new connector)** in the top right of the "Apps and Connectors" section.
 Enter **Agent.ai Tools** as the name and paste this URL:
```
https://mcp.agent.ai/mcp
```
Select **OAuth** for authentication and click **Create**. You'll be taken to sign in with your Agent.ai account.
Enter **Agent.ai Tools** as the name and paste this URL:
```
https://mcp.agent.ai/mcp
```
Select **OAuth** for authentication and click **Create**. You'll be taken to sign in with your Agent.ai account.
 ***
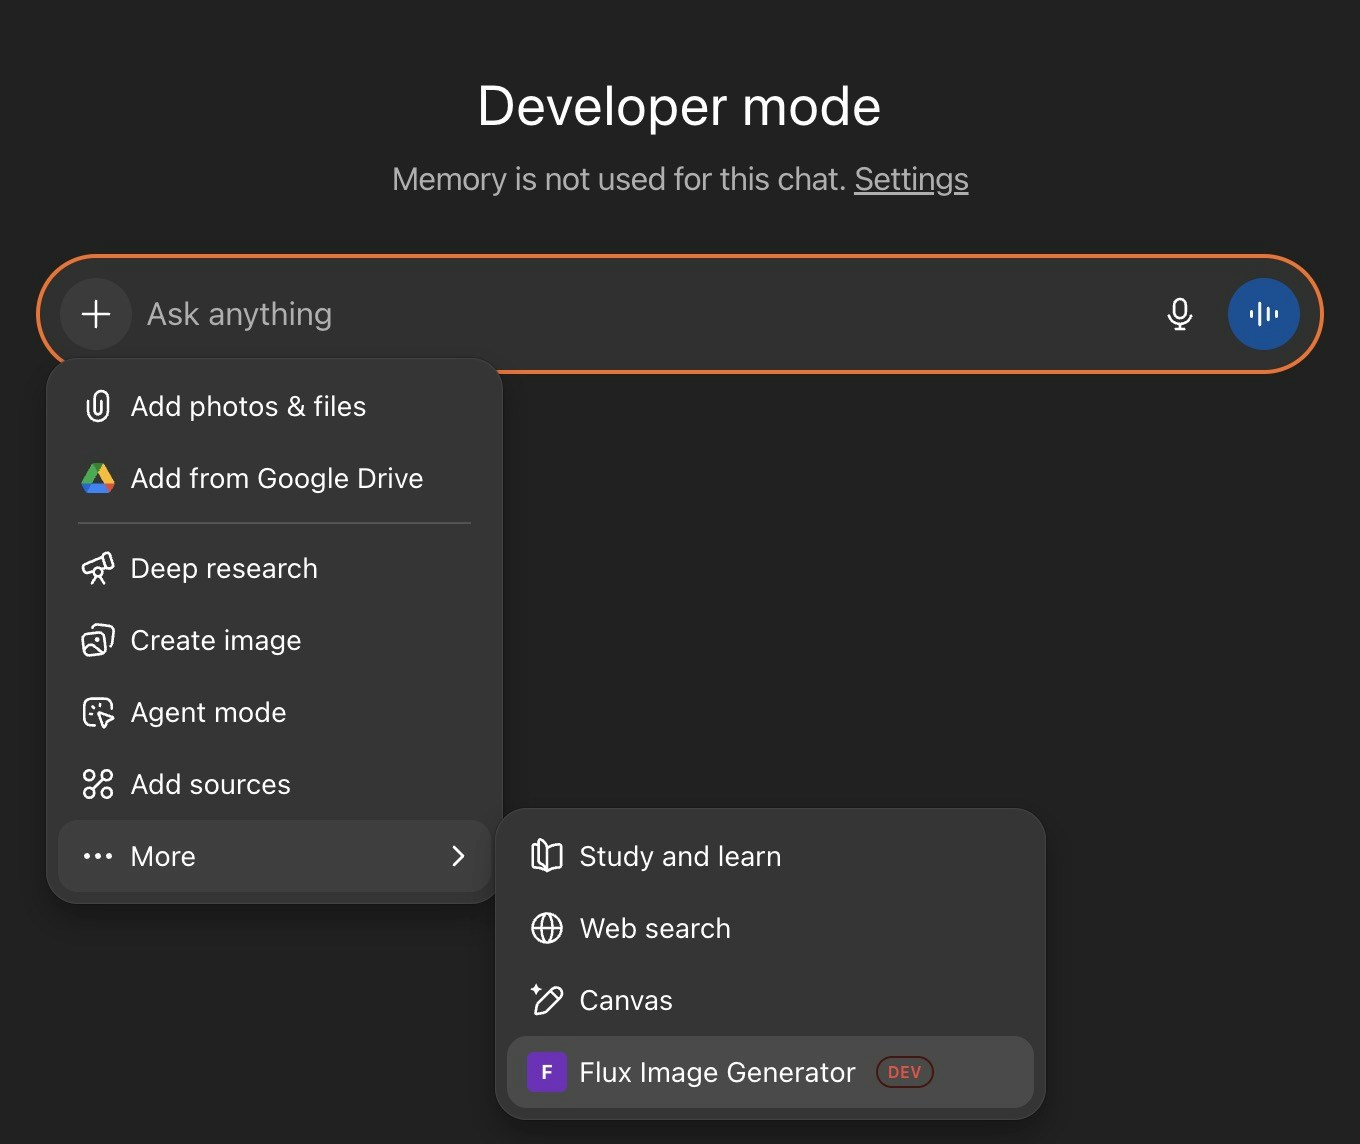
### Step 5: Start Using Agent.ai
Click the **"+"** icon in ChatGPT, select **"More"** from the dropdown, then select your Agent.ai connector.
***
### Step 5: Start Using Agent.ai
Click the **"+"** icon in ChatGPT, select **"More"** from the dropdown, then select your Agent.ai connector.
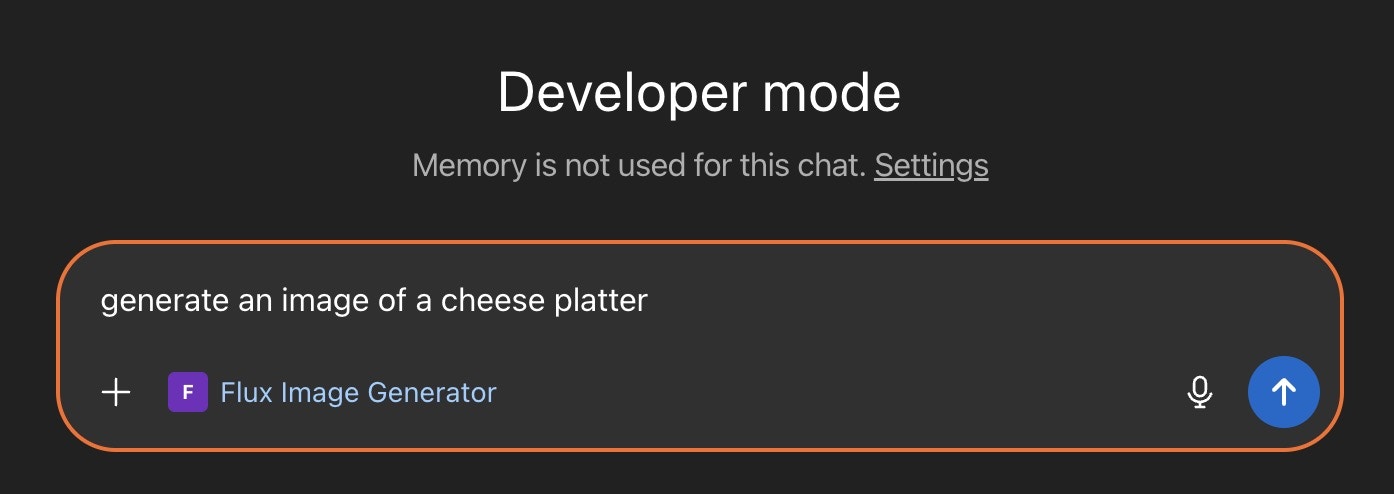 **You're all set!** All your Agent.ai tools and agents are now available in ChatGPT. Try asking ChatGPT to use one of your agents or actions!
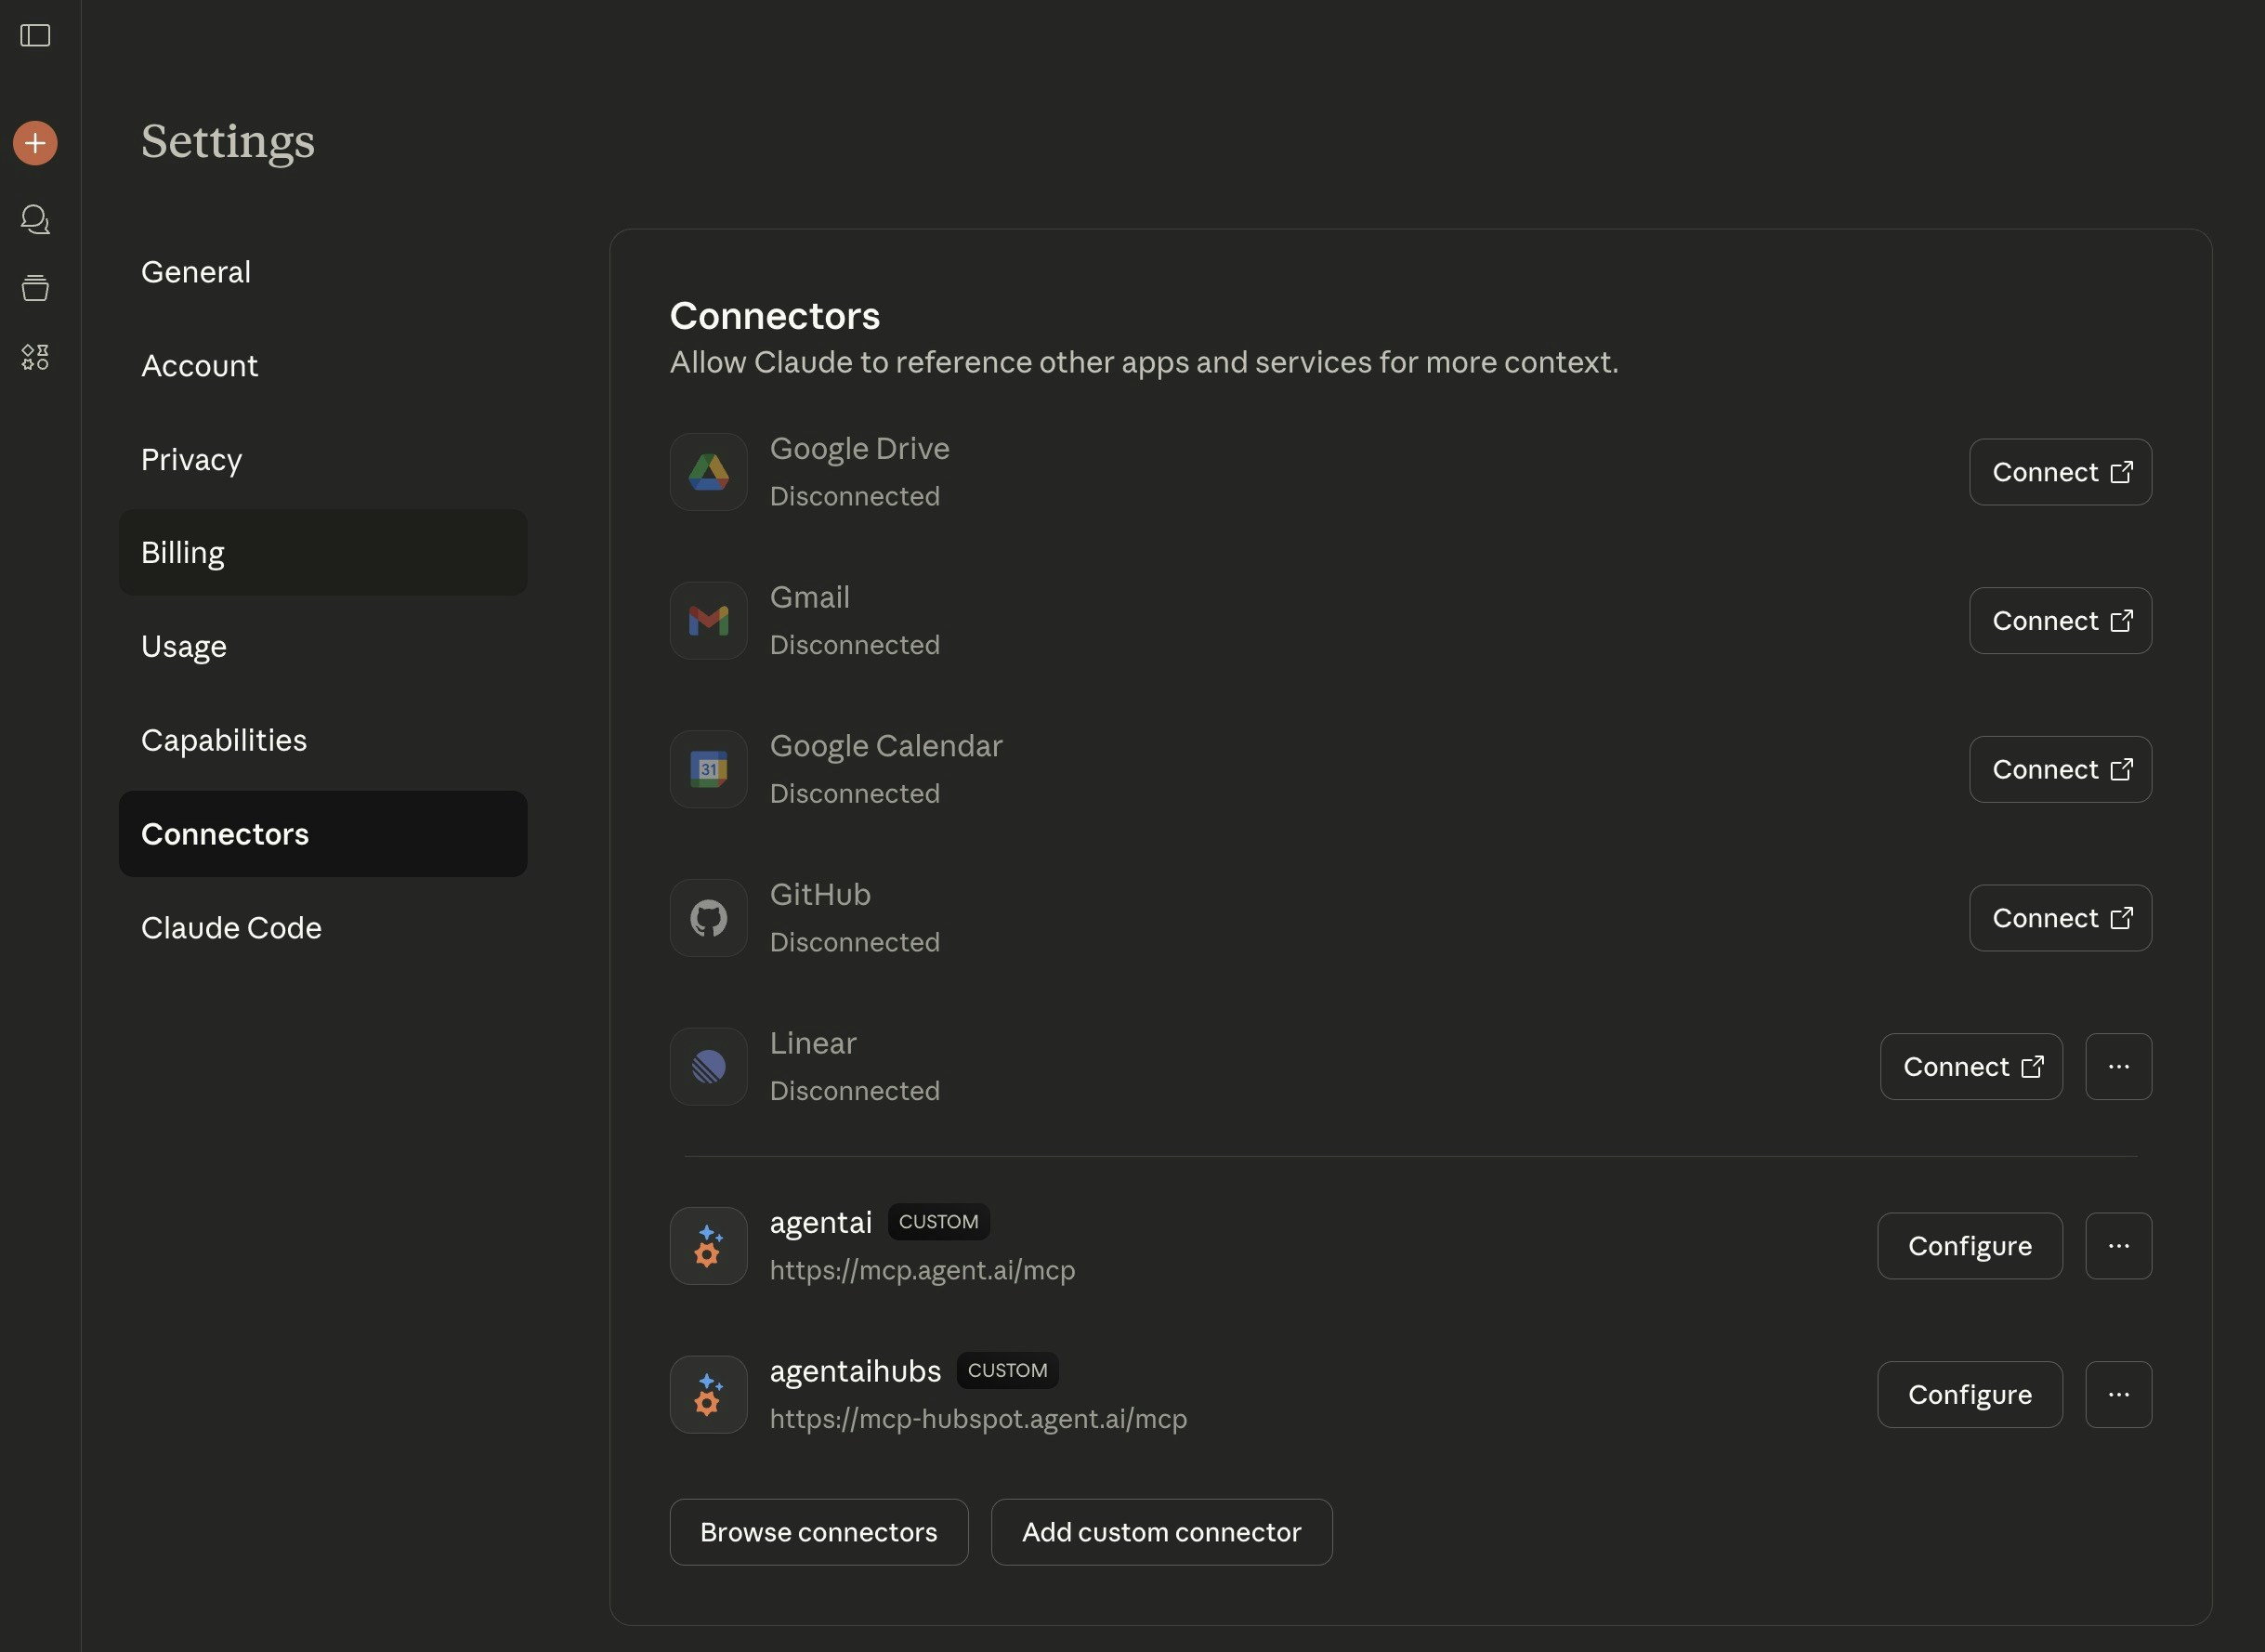
### Step 1: Open Claude Settings
In [Claude](https://claude.ai), go to **Settings** → **Connectors** section, then click **"Add custom connector"**.
**You're all set!** All your Agent.ai tools and agents are now available in ChatGPT. Try asking ChatGPT to use one of your agents or actions!
### Step 1: Open Claude Settings
In [Claude](https://claude.ai), go to **Settings** → **Connectors** section, then click **"Add custom connector"**.
 ***
### Step 2: Enter Name and URL
Enter **Agent.ai Tools** as the name and paste this URL:
```
https://mcp.agent.ai/mcp
```
Click **"Add"** and you'll be taken to sign in with your Agent.ai account.
***
### Step 2: Enter Name and URL
Enter **Agent.ai Tools** as the name and paste this URL:
```
https://mcp.agent.ai/mcp
```
Click **"Add"** and you'll be taken to sign in with your Agent.ai account.
 ***
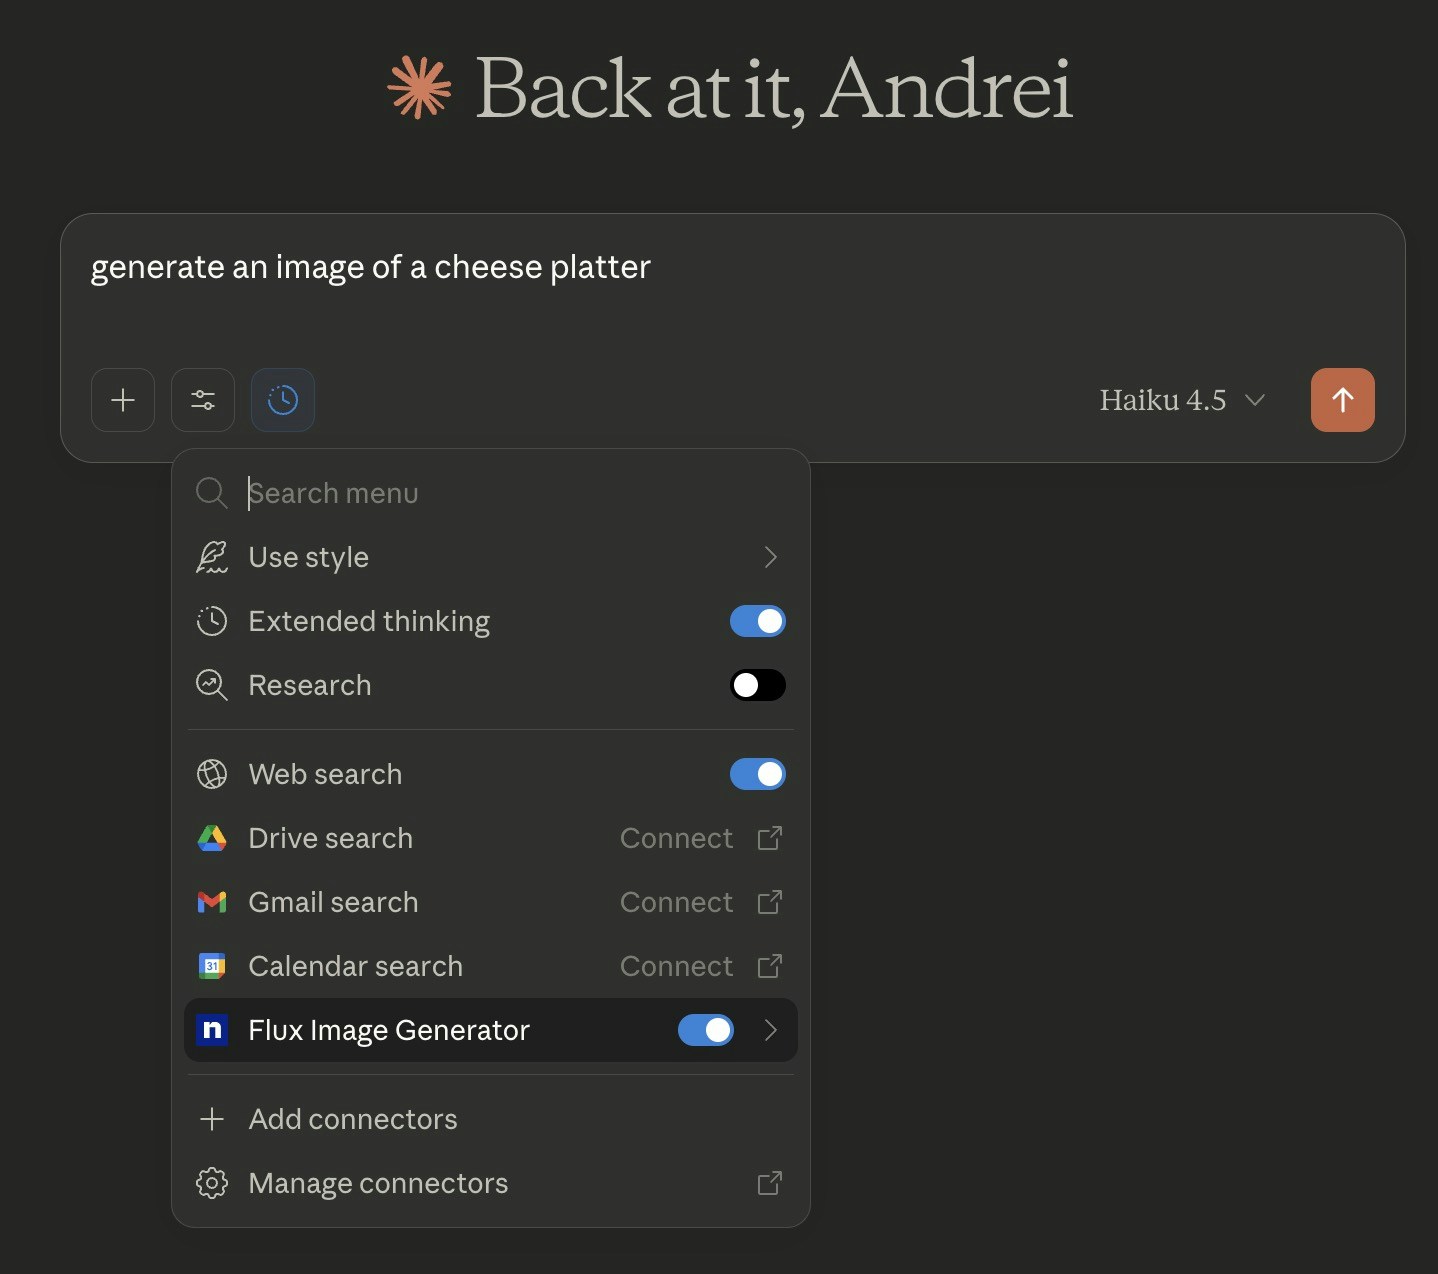
### Step 3: Enable and Start Chatting
Click the **Tools icon** in Claude, toggle on your Agent.ai connector, and start using your tools!
***
### Step 3: Enable and Start Chatting
Click the **Tools icon** in Claude, toggle on your Agent.ai connector, and start using your tools!
 **You're all set!** All your Agent.ai tools and agents are now available in Claude. Just mention your agents or ask Claude to use specific tools!
### Setting Up in Cursor
1. Open Cursor Settings
2. Navigate to **MCP** or **Model Context Protocol** section
3. Add a new MCP server with this configuration:
```json theme={null}
{
"agentai": {
"url": "https://mcp.agent.ai/mcp"
}
}
```
4. Restart Cursor
5. You'll be prompted to sign in with your Agent.ai account
**You're all set!** Your Agent.ai tools will appear in Cursor's AI assistant features.
***
## Security & Privacy
* ✅ Secure sign-in with your Agent.ai account
* ✅ AI assistants will always ask your permission before using tools
* ✅ You can approve tools once or for the entire conversation
* ✅ All communication is encrypted
***
## Troubleshooting
### Connection Issues
**"Can't connect" or "Authentication failed"**
* Make sure you're using the correct URL: `https://mcp.agent.ai/mcp`
* Try clearing your browser cache and signing in again
* Ensure you're logged into Agent.ai in your browser
**"No tools available"**
* Make sure you're signed in to Agent.ai
* Try disconnecting and reconnecting the Agent.ai connector
**AI assistant isn't using my tools**
* Make sure you've enabled the Agent.ai connector/tools in your conversation
* Try specifically mentioning the tool or agent by name
Still having issues? Contact our support team for help.
***
## Testing Your Connection
You can test your Agent.ai MCP server using the [Cloudflare MCP Playground](https://playground.ai.cloudflare.com/):
1. Visit [https://playground.ai.cloudflare.com/](https://playground.ai.cloudflare.com/)
2. Enter your MCP server URL: `https://mcp.agent.ai/mcp`
3. Click "Connect" and sign in with your Agent.ai account
4. The playground will list all your available tools
5. Test individual tools by selecting them and providing inputs
This is a great way to verify everything is working before using it with your AI assistant.
***
### HTTP over SSE (Legacy)
This method uses an API token instead of signing in. It still works but is not recommended for new setups.
**For Claude Desktop:**
1. Get your API token from the [integrations page](https://agent.ai/user/integrations)
2. Open Claude Desktop Settings → Developer → Edit Config
3. Add this configuration:
```json theme={null}
{
"mcpServers": {
"agentai": {
"command": "npx",
"args": [
"-y",
"@modelcontextprotocol/server-sse",
"https://mcp.agent.ai/YOUR_API_TOKEN_HERE/sse"
]
}
}
}
```
4. Replace `YOUR_API_TOKEN_HERE` with your actual API token
5. Restart Claude Desktop
### Standard I/O (Legacy)
This is the original connection method using our NPM package.
1. Get your API token from the [integrations page](https://agent.ai/user/integrations)
2. Open Claude Desktop Settings → Developer → Edit Config
3. Add this configuration:
```json theme={null}
{
"mcpServers": {
"agentai": {
"command": "npx",
"args": ["-y", "@agentai/mcp-server"],
"env": {
"API_TOKEN": "YOUR_API_TOKEN_HERE"
}
}
}
}
```
4. Replace `YOUR_API_TOKEN_HERE` with your actual API token
5. Restart Claude Desktop
**Troubleshooting Legacy Methods:**
* **"Connection refused"**: Verify your API token is correct and hasn't expired
* **"Authentication failed"**: Get a fresh token from the [integrations page](https://agent.ai/user/integrations)
* **NPM errors**: Ensure you have Node.js installed and npx is available
***
## Technical Details
### Server Configuration
Agent.ai's MCP server implements secure authentication with automatic client registration.
**Endpoints:**
* MCP Server: `https://mcp.agent.ai/mcp`
* OAuth Discovery: `https://mcp.agent.ai/.well-known/oauth-authorization-server`
* Health Check: `https://mcp.agent.ai/health`
### Authentication Flow
1. Client discovers OAuth endpoints via `.well-known/oauth-authorization-server`
2. Client automatically registers using Dynamic Client Registration (DCR)
3. User is redirected to authenticate with their Agent.ai account
4. Authorization code is exchanged for an access token
5. Client uses Bearer token for MCP requests
### Security Features
* OAuth 2.1 with PKCE (Proof Key for Code Exchange)
* JWT access tokens validated against Auth0
* Automatic token refresh for long-lived sessions
* Dynamic client registration (no pre-configuration needed)
### Available Tools
All your Agent.ai agents and tools are automatically available through the MCP server, including:
* Action Tools: Core Agent.ai capabilities
* Team Agents: Shared within your organization
* Private Agents: Your personal agents
* Public Agents: Community agents you've added
### Protocol Support
The server supports multiple MCP protocol versions:
* 2024-11-05
* 2025-03-26
Version negotiation happens automatically during client initialization.
### Integration Example
For custom MCP clients:
```javascript theme={null}
import { Client } from '@modelcontextprotocol/sdk/client/index.js';
const client = new Client({
name: 'my-mcp-client',
version: '1.0.0',
}, {
capabilities: {}
});
// Connect with OAuth support
await client.connect('https://mcp.agent.ai/mcp');
// List available tools
const tools = await client.request({
method: 'tools/list'
}, ListToolsResultSchema);
// Call a tool
const result = await client.request({
method: 'tools/call',
params: {
name: 'tool-name',
arguments: { /* tool arguments */ }
}
}, CallToolResultSchema);
```
### NPM Package
The legacy NPM package is available at:
[https://www.npmjs.com/package/@agentai/mcp-server](https://www.npmjs.com/package/@agentai/mcp-server)
Note: New integrations should use the OAuth method instead of the NPM package.
***
For additional help or to report issues, please contact our support team.
**You're all set!** All your Agent.ai tools and agents are now available in Claude. Just mention your agents or ask Claude to use specific tools!
### Setting Up in Cursor
1. Open Cursor Settings
2. Navigate to **MCP** or **Model Context Protocol** section
3. Add a new MCP server with this configuration:
```json theme={null}
{
"agentai": {
"url": "https://mcp.agent.ai/mcp"
}
}
```
4. Restart Cursor
5. You'll be prompted to sign in with your Agent.ai account
**You're all set!** Your Agent.ai tools will appear in Cursor's AI assistant features.
***
## Security & Privacy
* ✅ Secure sign-in with your Agent.ai account
* ✅ AI assistants will always ask your permission before using tools
* ✅ You can approve tools once or for the entire conversation
* ✅ All communication is encrypted
***
## Troubleshooting
### Connection Issues
**"Can't connect" or "Authentication failed"**
* Make sure you're using the correct URL: `https://mcp.agent.ai/mcp`
* Try clearing your browser cache and signing in again
* Ensure you're logged into Agent.ai in your browser
**"No tools available"**
* Make sure you're signed in to Agent.ai
* Try disconnecting and reconnecting the Agent.ai connector
**AI assistant isn't using my tools**
* Make sure you've enabled the Agent.ai connector/tools in your conversation
* Try specifically mentioning the tool or agent by name
Still having issues? Contact our support team for help.
***
## Testing Your Connection
You can test your Agent.ai MCP server using the [Cloudflare MCP Playground](https://playground.ai.cloudflare.com/):
1. Visit [https://playground.ai.cloudflare.com/](https://playground.ai.cloudflare.com/)
2. Enter your MCP server URL: `https://mcp.agent.ai/mcp`
3. Click "Connect" and sign in with your Agent.ai account
4. The playground will list all your available tools
5. Test individual tools by selecting them and providing inputs
This is a great way to verify everything is working before using it with your AI assistant.
***
### HTTP over SSE (Legacy)
This method uses an API token instead of signing in. It still works but is not recommended for new setups.
**For Claude Desktop:**
1. Get your API token from the [integrations page](https://agent.ai/user/integrations)
2. Open Claude Desktop Settings → Developer → Edit Config
3. Add this configuration:
```json theme={null}
{
"mcpServers": {
"agentai": {
"command": "npx",
"args": [
"-y",
"@modelcontextprotocol/server-sse",
"https://mcp.agent.ai/YOUR_API_TOKEN_HERE/sse"
]
}
}
}
```
4. Replace `YOUR_API_TOKEN_HERE` with your actual API token
5. Restart Claude Desktop
### Standard I/O (Legacy)
This is the original connection method using our NPM package.
1. Get your API token from the [integrations page](https://agent.ai/user/integrations)
2. Open Claude Desktop Settings → Developer → Edit Config
3. Add this configuration:
```json theme={null}
{
"mcpServers": {
"agentai": {
"command": "npx",
"args": ["-y", "@agentai/mcp-server"],
"env": {
"API_TOKEN": "YOUR_API_TOKEN_HERE"
}
}
}
}
```
4. Replace `YOUR_API_TOKEN_HERE` with your actual API token
5. Restart Claude Desktop
**Troubleshooting Legacy Methods:**
* **"Connection refused"**: Verify your API token is correct and hasn't expired
* **"Authentication failed"**: Get a fresh token from the [integrations page](https://agent.ai/user/integrations)
* **NPM errors**: Ensure you have Node.js installed and npx is available
***
## Technical Details
### Server Configuration
Agent.ai's MCP server implements secure authentication with automatic client registration.
**Endpoints:**
* MCP Server: `https://mcp.agent.ai/mcp`
* OAuth Discovery: `https://mcp.agent.ai/.well-known/oauth-authorization-server`
* Health Check: `https://mcp.agent.ai/health`
### Authentication Flow
1. Client discovers OAuth endpoints via `.well-known/oauth-authorization-server`
2. Client automatically registers using Dynamic Client Registration (DCR)
3. User is redirected to authenticate with their Agent.ai account
4. Authorization code is exchanged for an access token
5. Client uses Bearer token for MCP requests
### Security Features
* OAuth 2.1 with PKCE (Proof Key for Code Exchange)
* JWT access tokens validated against Auth0
* Automatic token refresh for long-lived sessions
* Dynamic client registration (no pre-configuration needed)
### Available Tools
All your Agent.ai agents and tools are automatically available through the MCP server, including:
* Action Tools: Core Agent.ai capabilities
* Team Agents: Shared within your organization
* Private Agents: Your personal agents
* Public Agents: Community agents you've added
### Protocol Support
The server supports multiple MCP protocol versions:
* 2024-11-05
* 2025-03-26
Version negotiation happens automatically during client initialization.
### Integration Example
For custom MCP clients:
```javascript theme={null}
import { Client } from '@modelcontextprotocol/sdk/client/index.js';
const client = new Client({
name: 'my-mcp-client',
version: '1.0.0',
}, {
capabilities: {}
});
// Connect with OAuth support
await client.connect('https://mcp.agent.ai/mcp');
// List available tools
const tools = await client.request({
method: 'tools/list'
}, ListToolsResultSchema);
// Call a tool
const result = await client.request({
method: 'tools/call',
params: {
name: 'tool-name',
arguments: { /* tool arguments */ }
}
}, CallToolResultSchema);
```
### NPM Package
The legacy NPM package is available at:
[https://www.npmjs.com/package/@agentai/mcp-server](https://www.npmjs.com/package/@agentai/mcp-server)
Note: New integrations should use the OAuth method instead of the NPM package.
***
For additional help or to report issues, please contact our support team.