The User Settings page lets you manage your profile details, preferences, and integrations. From notifications to API credits, this is where you control how Agent.ai works for you.
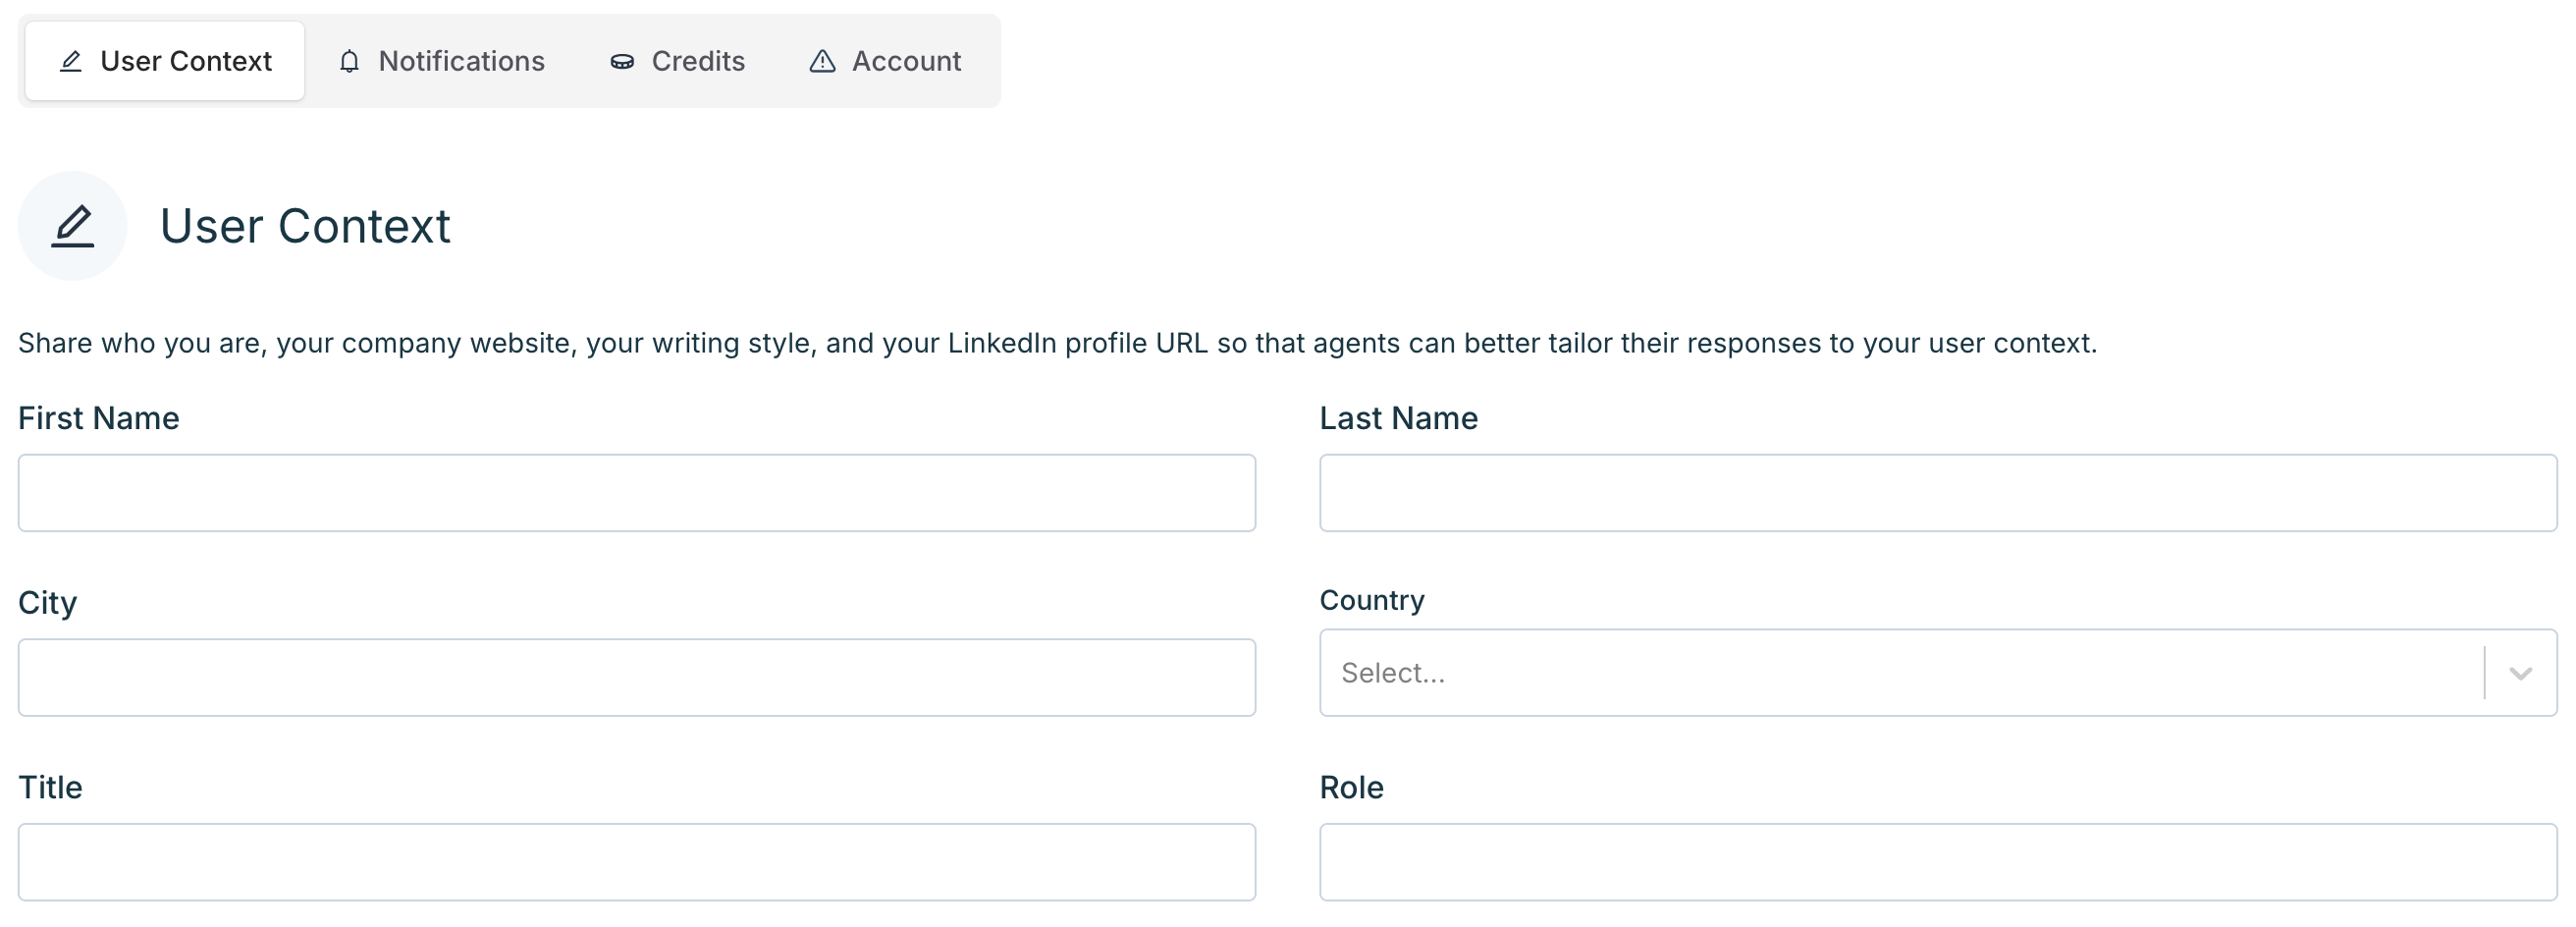
User Context

Add basic info like your name, location, title, and role so agents can tailor their responses to your background and communication style.

To update your user context:

  1. Go to User Context in your profile settings
  2. Fill out any fields you’d like agents to reference in their responses
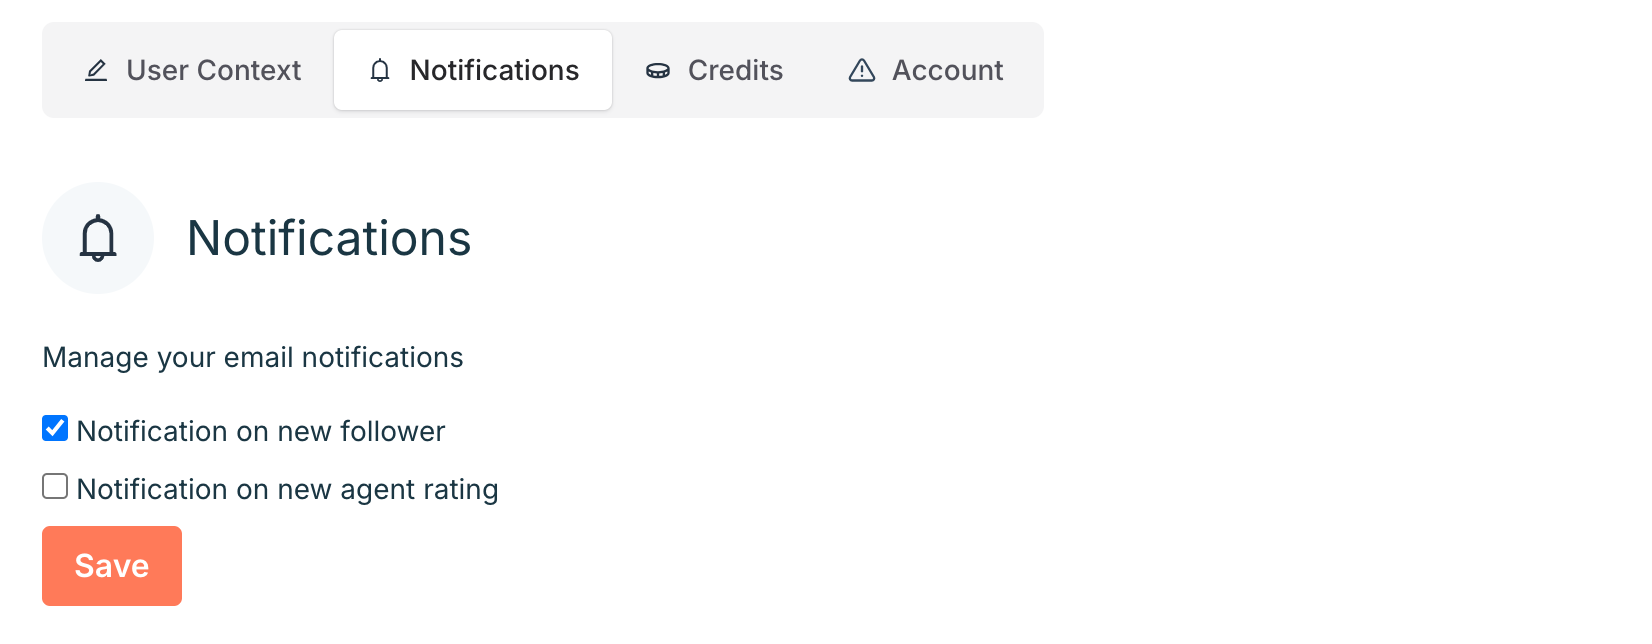
Notifications

Manage when you receive email notifications from Agent.ai. You can choose to be notified when:

  • Someone follows your profile
  • One of your agents receives a new rating

To update your notification preferences, check or uncheck the boxes, then click Save.
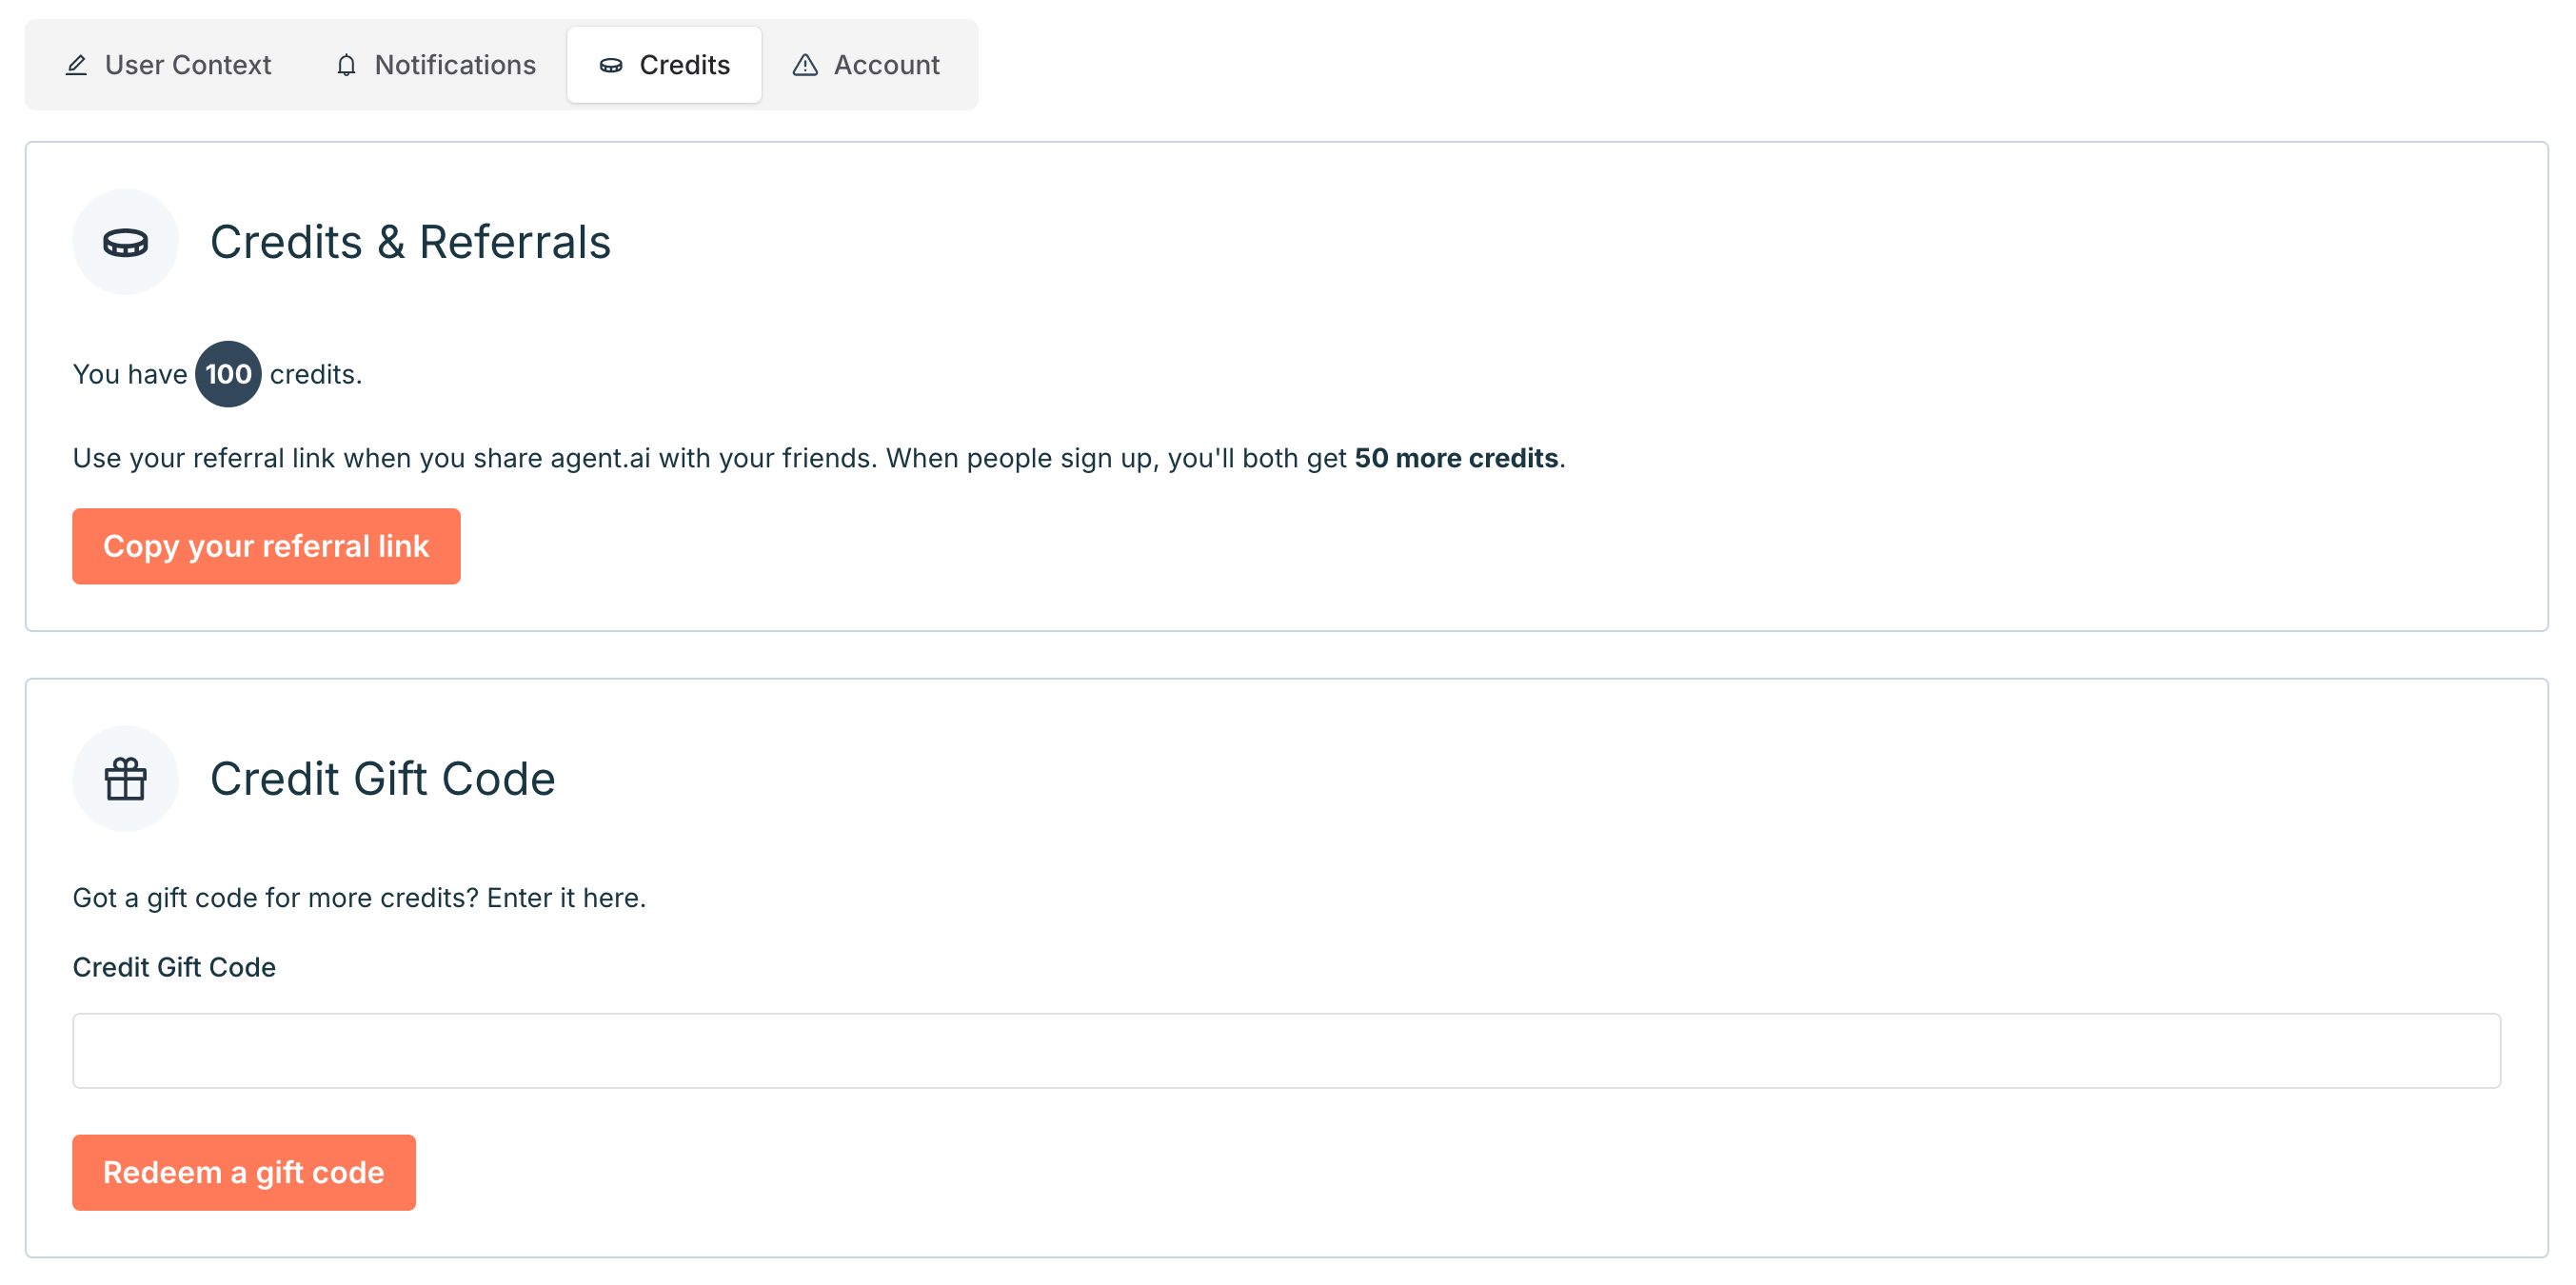
Integrations

Connect third-party services like X, Google, and HubSpot to unlock agent actions powered by your own data.

From this page, you can:

  • Add, reconnect, or disconnect integrations
  • Set a default account (for email or portal use)
  • View agent-specific access when applicable

X Connection

Connect your X (formerly Twitter) account to create a public builder profile and enable agents to perform X-specific actions like retrieving X accounts or posts.

  • Your builder email alias will be based on your handle (e.g. [email protected])
  • Click Reconnect or Disconnect to manage access

Google Connections

Connect your Google account to enable agents to perform actions like creating Google Docs.

  • Add multiple accounts and set a default email
  • Click Connect More Accounts to add others
  • Use Reconnect or Disconnect as needed

HubSpot Connections

Connect your HubSpot portal to enable agents to perform CRM-related actions, including working with contacts and companies. You can connect to multiple HubSpot portals and:

  • Set a default portal
  • View which agents have private access to your portal
  • Click Connect More Portals to add additional HubSpot accounts

Credits & API Key

On this page, you can track your available credits, refer friends, redeem gift codes, or access your API key for programmatic agent interactions.

Credits & Referrals

  • View your current credit balance
  • Copy your referral link to share Agent.ai—when someone signs up with your link, you both receive 50 additional credits

Credit Gift Code

  • If you have a gift code, enter it in the field provided and click Redeem a gift code to add more credits to your account
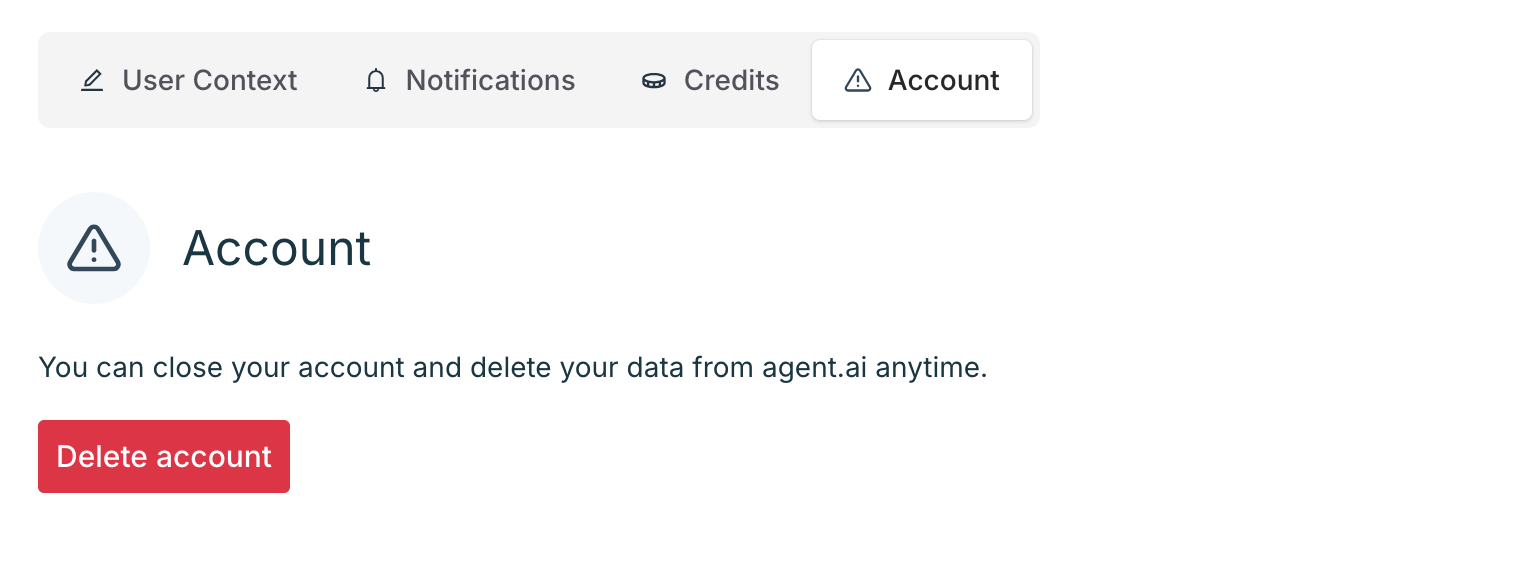
API Key

Your API key allows you to integrate Agent.ai features directly into your own tools and workflows. You’ll find:

Keep your API key private. It grants access to your Agent.ai account and credit usage—treat it like a password. Don’t share it or commit it to public repositories.

Account

If you no longer wish to use Agent.ai, you can permanently delete your account and all associated data.

To delete your account:

  1. Go to the Account tab in your settings
  2. Click Delete account
  3. Confirm the action when prompted

This action is irreversible. All agents, data, and settings will be permanently removed.

MCP

Use the MCP tab to configure your Agent.ai MCP server and manage which agents are available to external MCP-supported tools like Claude Desktop.

Agent.ai MCP Tools Listing Settings

Choose which agents you’d like to expose to your MCP environment:

  • Action Agents (default)
  • My Team Agents
  • Private Agents
  • Top Public Agents (rating > 4.2, reviews > 3)

Check the boxes you want, then click Save.

MCP Configuration

To connect your MCP server to Agent.ai, add the provided config block to your MCP server’s configuration file.

For full setup instructions, see the MCP Integration Guide.

Reach out to our support team if you have any questions about user settings or navigating Agent.ai.