Create Your First Agent
To create an agent, click on the “Create Agent” modal. You can either start building an agent from scratch or start building from one of our existing templates. Let’s start by building an agent from scratch. Don’t worry, it’s easier than it sounds!Settings
The builder has 2 sections: the core Builder canvas and settings. Most information in settings is optional, so don’t if you don’t know what some of those words mean. Let’s start with the settings panel. Here we define how the agent will show up when users try to use it and how it will show up in the marketplace.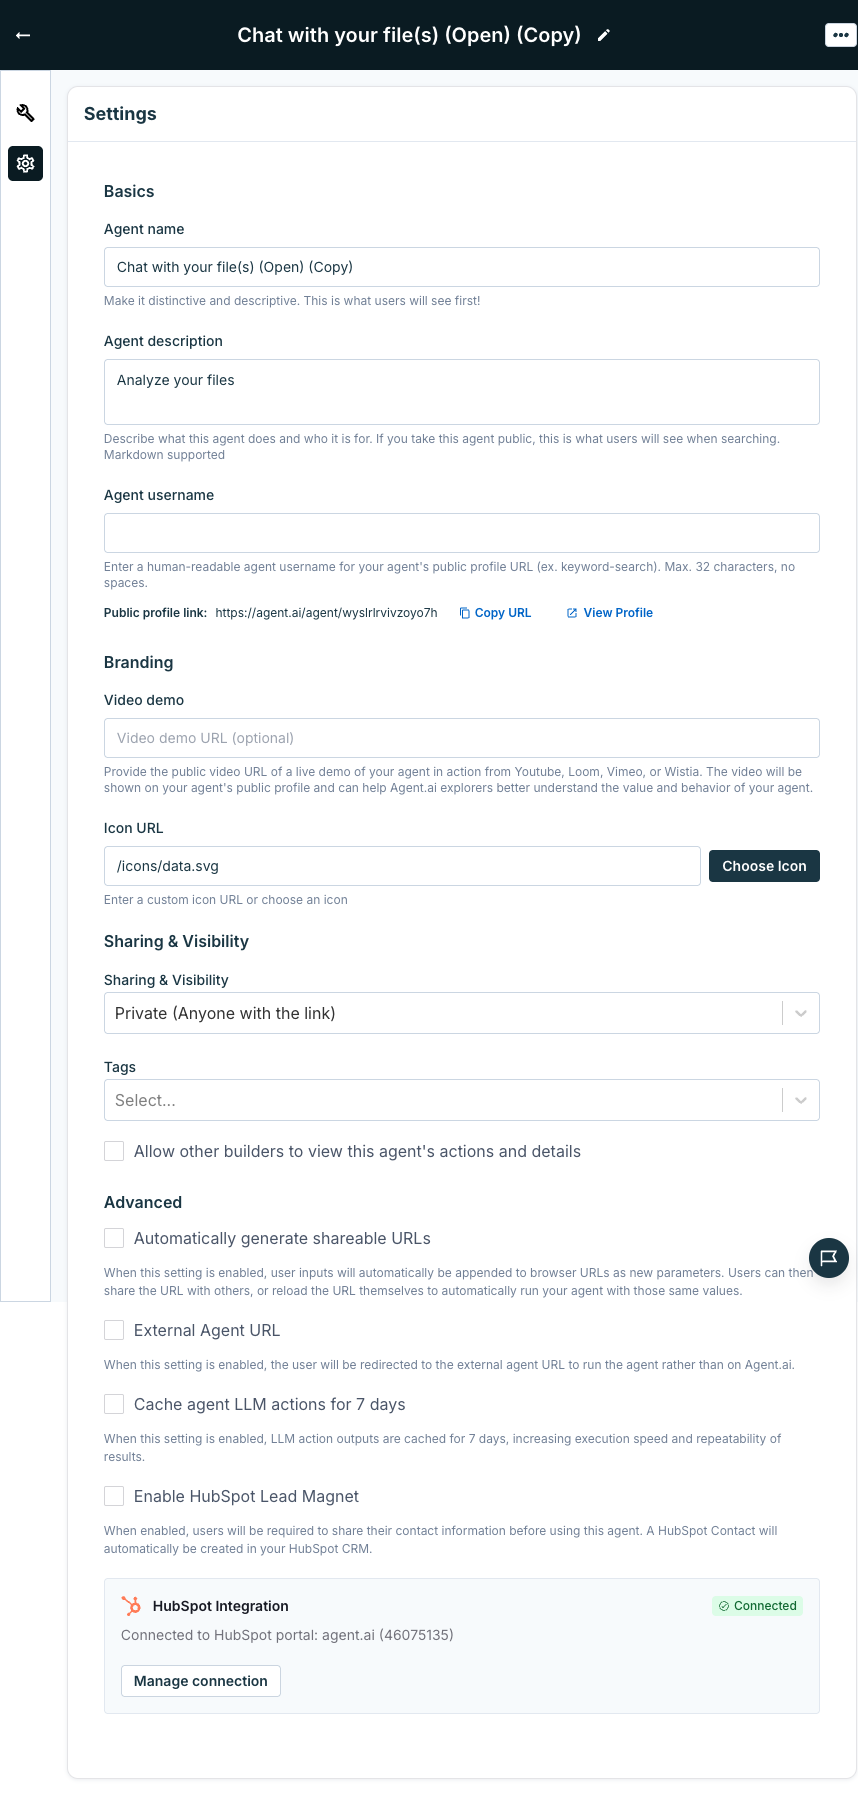
Required Information
The following information is required:- **Agent Name: **Name your agent based on its function. Make this descriptive to reflect what the agent does (e.g., “Data Fetcher,” “Customer Profile Enricher”).
- **Agent Description: **Describe what your agent is built to do. This can include any specific automation or tasks it handles (e.g., “Fetches and enriches customer data from LinkedIn profiles”).
- Agent Tag(s): Add tags that make it easier to search or categorize your agent for quick access.
Optional Information
The following information is not required, but will help people get a better understanding of what your agent can do and will help it stand out:- Icon URL: You can add a visual representation by uploading an icon or linking to an image file that represents your agent’s purpose.
- Sharing and Visibility:
- Private (only me): Only your user has access to run the agent
- Private: unlisted, where only people with the link can use the agent
- User only: only the author can use this agent
- Specific HubSpot Portals: Only users connected to a a HubSpot portal ID you provide can view and run this agent
- Specific users: define a list of user’s email addresses that can use the agent
- Public: all users can use this agent
- Video Demo: Provide the public video URL of a live demo of your agent in action from Youtube, Loom, Vimeo, or Wistia, or upload a local recording. You can copy this URL from the video player on any of these sites. This video will be shown to Agent.AI site explorers to help better understand the value and behavior of your agent.
- Agent Username: This is the unique identifier for your agent, which will be used in the agent URL.
Advanced Options
The following settings allow you to control behavior of your agent’s that you may want to change in less situations. We recommend you only update these settings if you know their impact.- Automatically generate sharable URLs: When this setting is enabled, user inputs will automatically be appended to browser urls as new parameters. Users can then share the URL with others, or reload the url themselves to automatically run your agent with those same values.
- Cache agent LLM actions for 7 days: When enabled, this feature stores LLM responses for up to seven days. If the same exact prompt is used again during that period, the system will return the cached response instead of generating a new one. This feature is intended to support faster, more predictable agent runs by re-using responses between runs.
- External Agent URL: When enabled, this feature allows your agent profile to point to an external URL (outside of Agent.ai) where your agent will be run
- **HubSpot Lead Magent: **When enabled, this feature requires users of your agent to opt-in to sharing their infromation prior to running the agent. When they agree, their email address will be used to automatically create a new contact in the connected HubSpot portal. You can then use this email to update data throughout the run in HubSpot. To use this option you must have an existing, connected HubSpot Portal.
Trigger
Triggers determine when the Agent will be run. You can see and configure triggers at the top of the Builder canvas.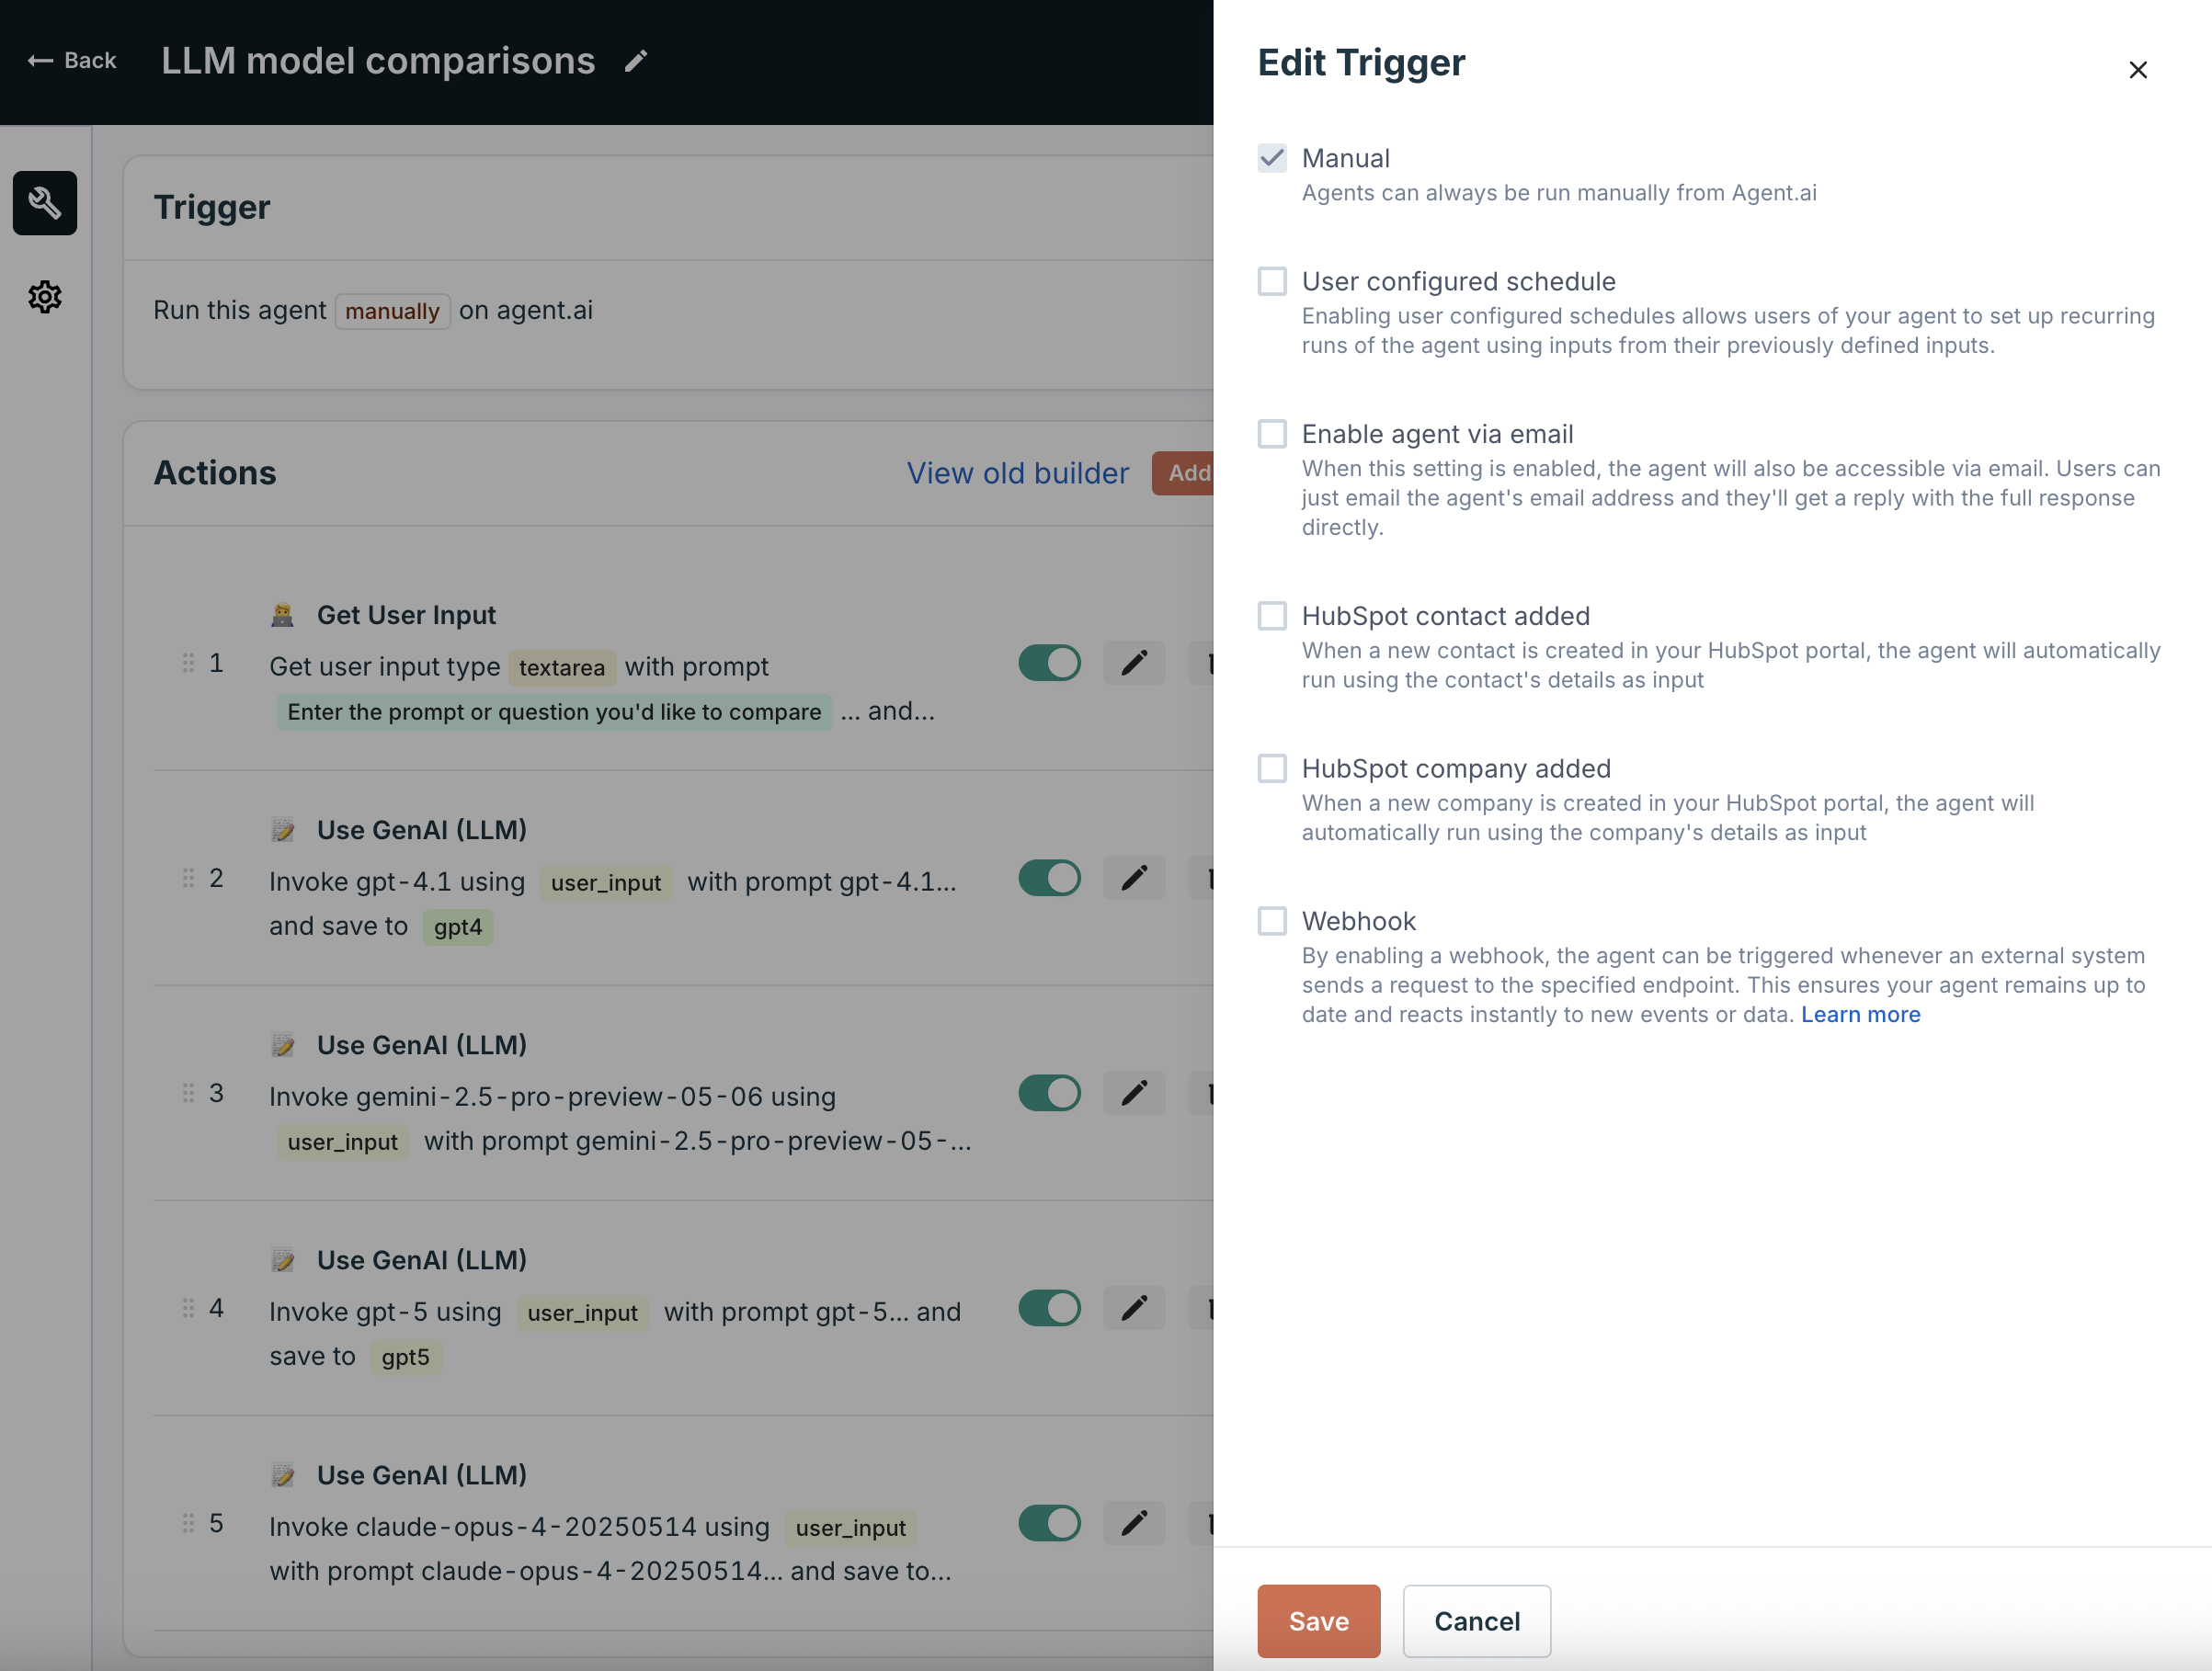
Manual
Agents can always be run manually, but selecting ‘Manual Only’ ensures this agent can only be triggered directly from Agent.AIUser configured schedule
Enabling user configured schedules allows users of your agent to set up recurring runs of the agent using inputs from their previously defined inputs. How it works- When a user runs your agent that has “User configured schedule” enabled, they will see an “Auto Schedule” button
- Clicking “Auto Schedule” opens a scheduling dialog where:
- The inputs from their last run will be pre-filled
- They can choose a frequency (Daily, Weekly, Monthly, or Quarterly)
- They can review and confirm the schedule
- After clicking “Save Schedule”, the agent will run automatically on the selected schedule
Enable agent via email
When this setting is enabled, the agent will also be accessible via email. Users can email the agent’s address and receive a full response back. Email-triggered agents can now also support file attachments. When an incoming email includes an attachment, the file is automatically uploaded and made available to your workflow. You can reference it in subsequent steps just like any other user-provided file.Agents will only respond to emails sent from the same address you use to log into Agent.ai.
HubSpot Contact/Company Added
Automatically trigger the agent when a new contact or company is added to HubSpot, a useful feature for CRM automation.Webhook
By enabling a webhook, the agent can be triggered whenever an external system sends a request to the specified endpoint. This ensures your agent remains up to date and reacts instantly to new events or data. How to Use Webhooks When enabled, your agent can be triggered by sending an HTTP POST request to the webhook URL, it would look like:- Copy the curl command from your agent’s webhook configuration
- Replace placeholder values with your actual data
- Run the command in your terminal for testing
- Your agent will execute automatically with the provided inputs
- Replace the first “REPLACE_ME” with a YouTube URL
- Replace the second “REPLACE_ME” with your email address
- Paste and run in your terminal (command prompt)
- You’ll receive an email with the video summary shortly
Actions
In the Actions section of the Builder, users define the steps the agent will perform. Each action is a building block in your workflow, and the order of these actions will determine how the agent operates. Below is a breakdown of the available actions and how you can use them effectively.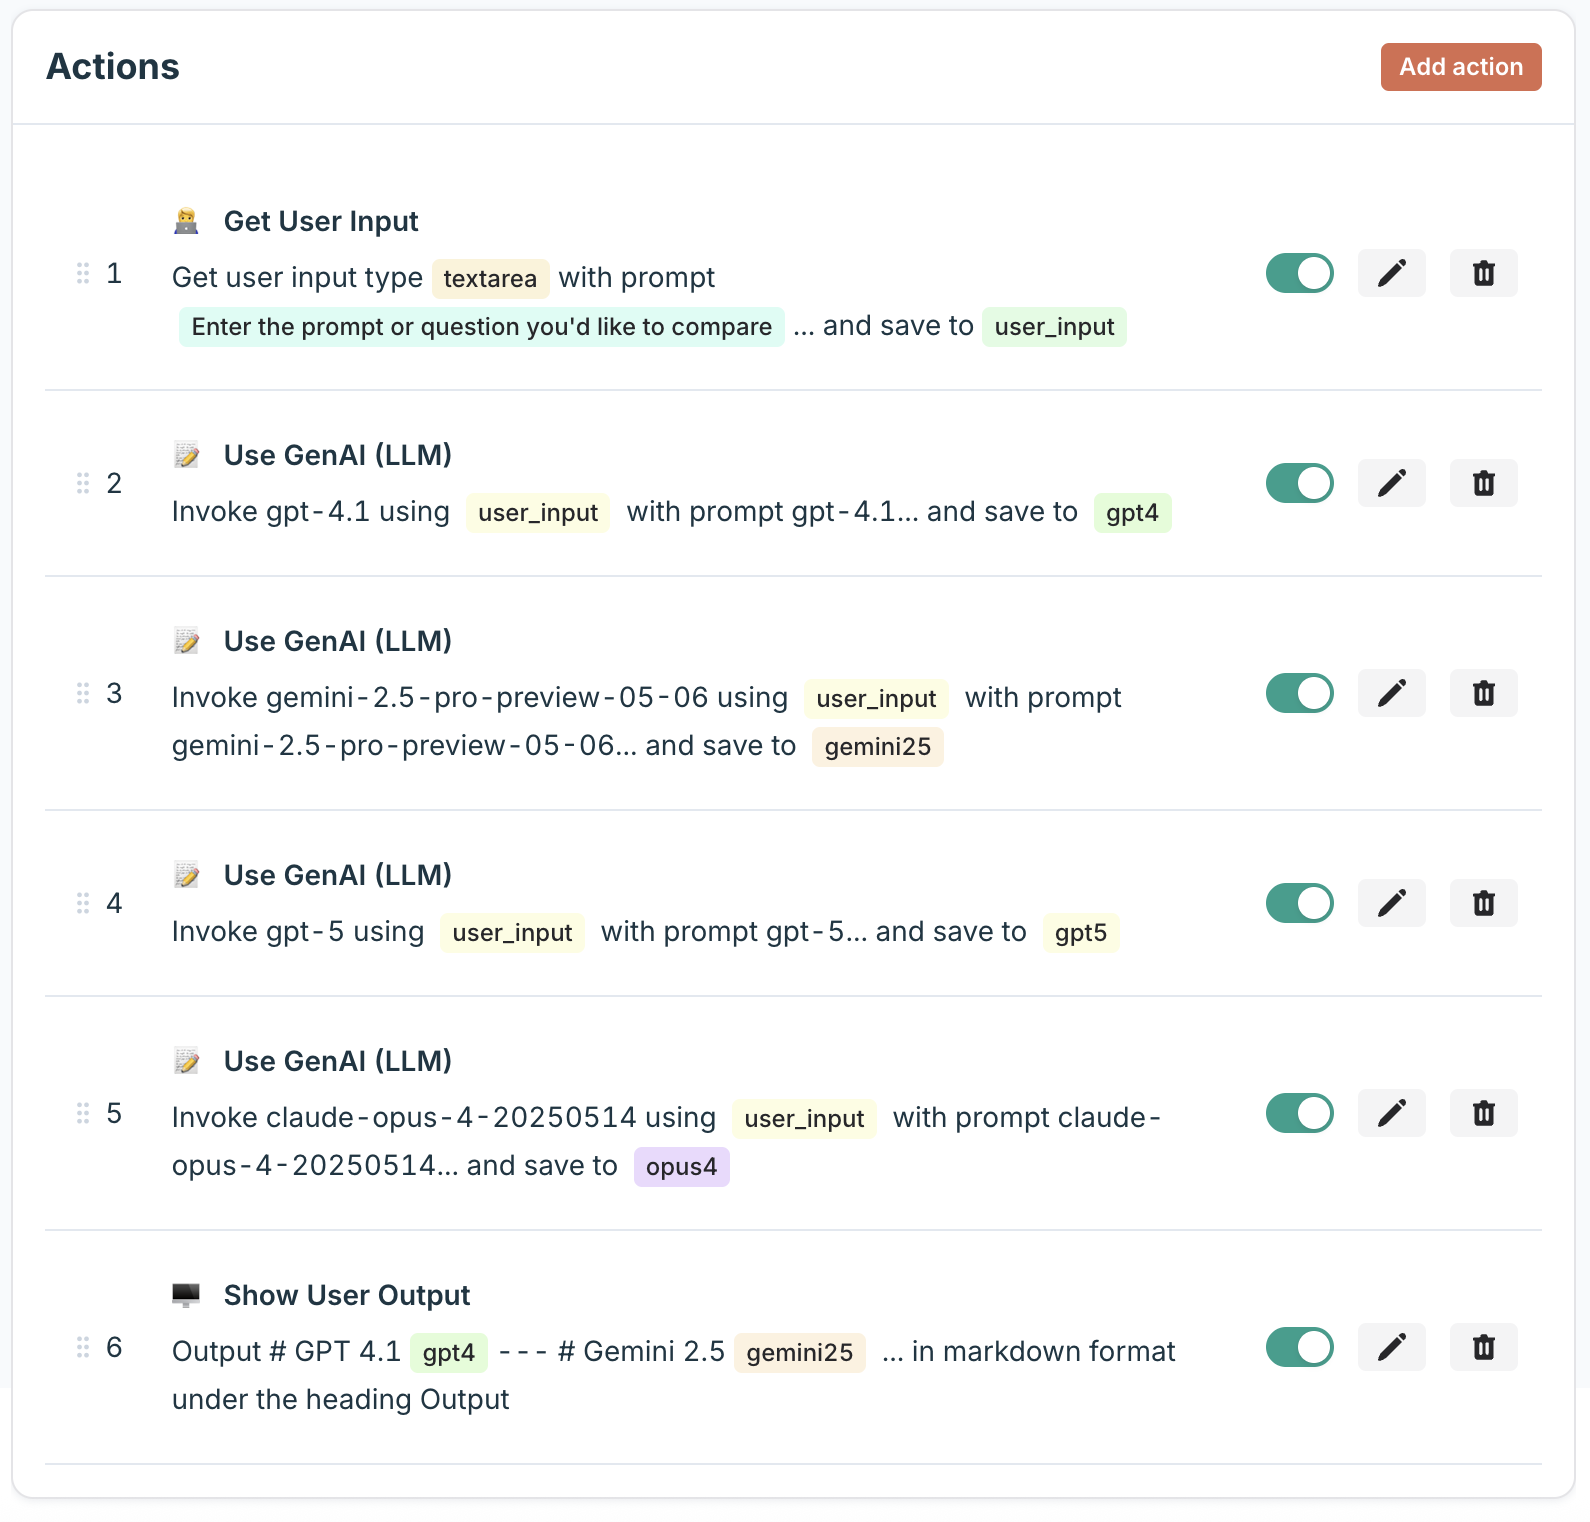
Inputs & Data Retrieval
Gather, manage, and retrieve the data your agent needs to operate. This category includes actions for prompting users for input, fetching information from websites, searching the web, and reading from your knowledge base. Use these actions to make your agents interactive, conduct research, and provide them with the data they need to perform their tasks.Social Media & Online Presence
Connect to social media platforms to automate your online presence. These actions allow you to interact with platforms like X (formerly Twitter), LinkedIn, and Instagram. You can build agents to monitor social media for mentions of your brand, post updates, or gather information about users and trends.Hubspot CRM & Automation
Connect directly to your HubSpot CRM to manage and automate your customer relationships. These actions allow you to create, retrieve, update, and delete objects in HubSpot, such as contacts, companies, and deals. For example, you can build an agent that automatically adds new leads to your CRM or updates a contact’s information based on a user’s interaction.Business & Financial Data
Access valuable business and financial information to power your agents. This category includes actions for getting company details, financial statements, and stock prices. These tools are perfect for building agents that perform market research, competitive analysis, or financial monitoring.Workflow & Logic
Control the flow of your agent’s execution with powerful workflow actions. This category includes actions for running custom code, calling external APIs, invoking other agents, and implementing conditional logic. Use these actions to build complex, multi-step workflows, create branching logic, and integrate with almost any third-party service.AI & Content Generation
Leverage the power of large language models (LLMs) to perform complex tasks. These actions allow you to generate text, analyze sentiment, summarize information, generate images, and more. This is where you can integrate models from providers like OpenAI and Anthropic to build sophisticated AI-powered agents.Outputs
Deliver meaningful, formatted results that can be communicated or saved for further use. Create engaging outputs like email messages, blog posts, Google Docs, or formatted tables based on workflow data. For example, send users a custom report via email, save generated content as a document, or display a summary table directly on the interface—ensuring results are clear, actionable, and easy to understand.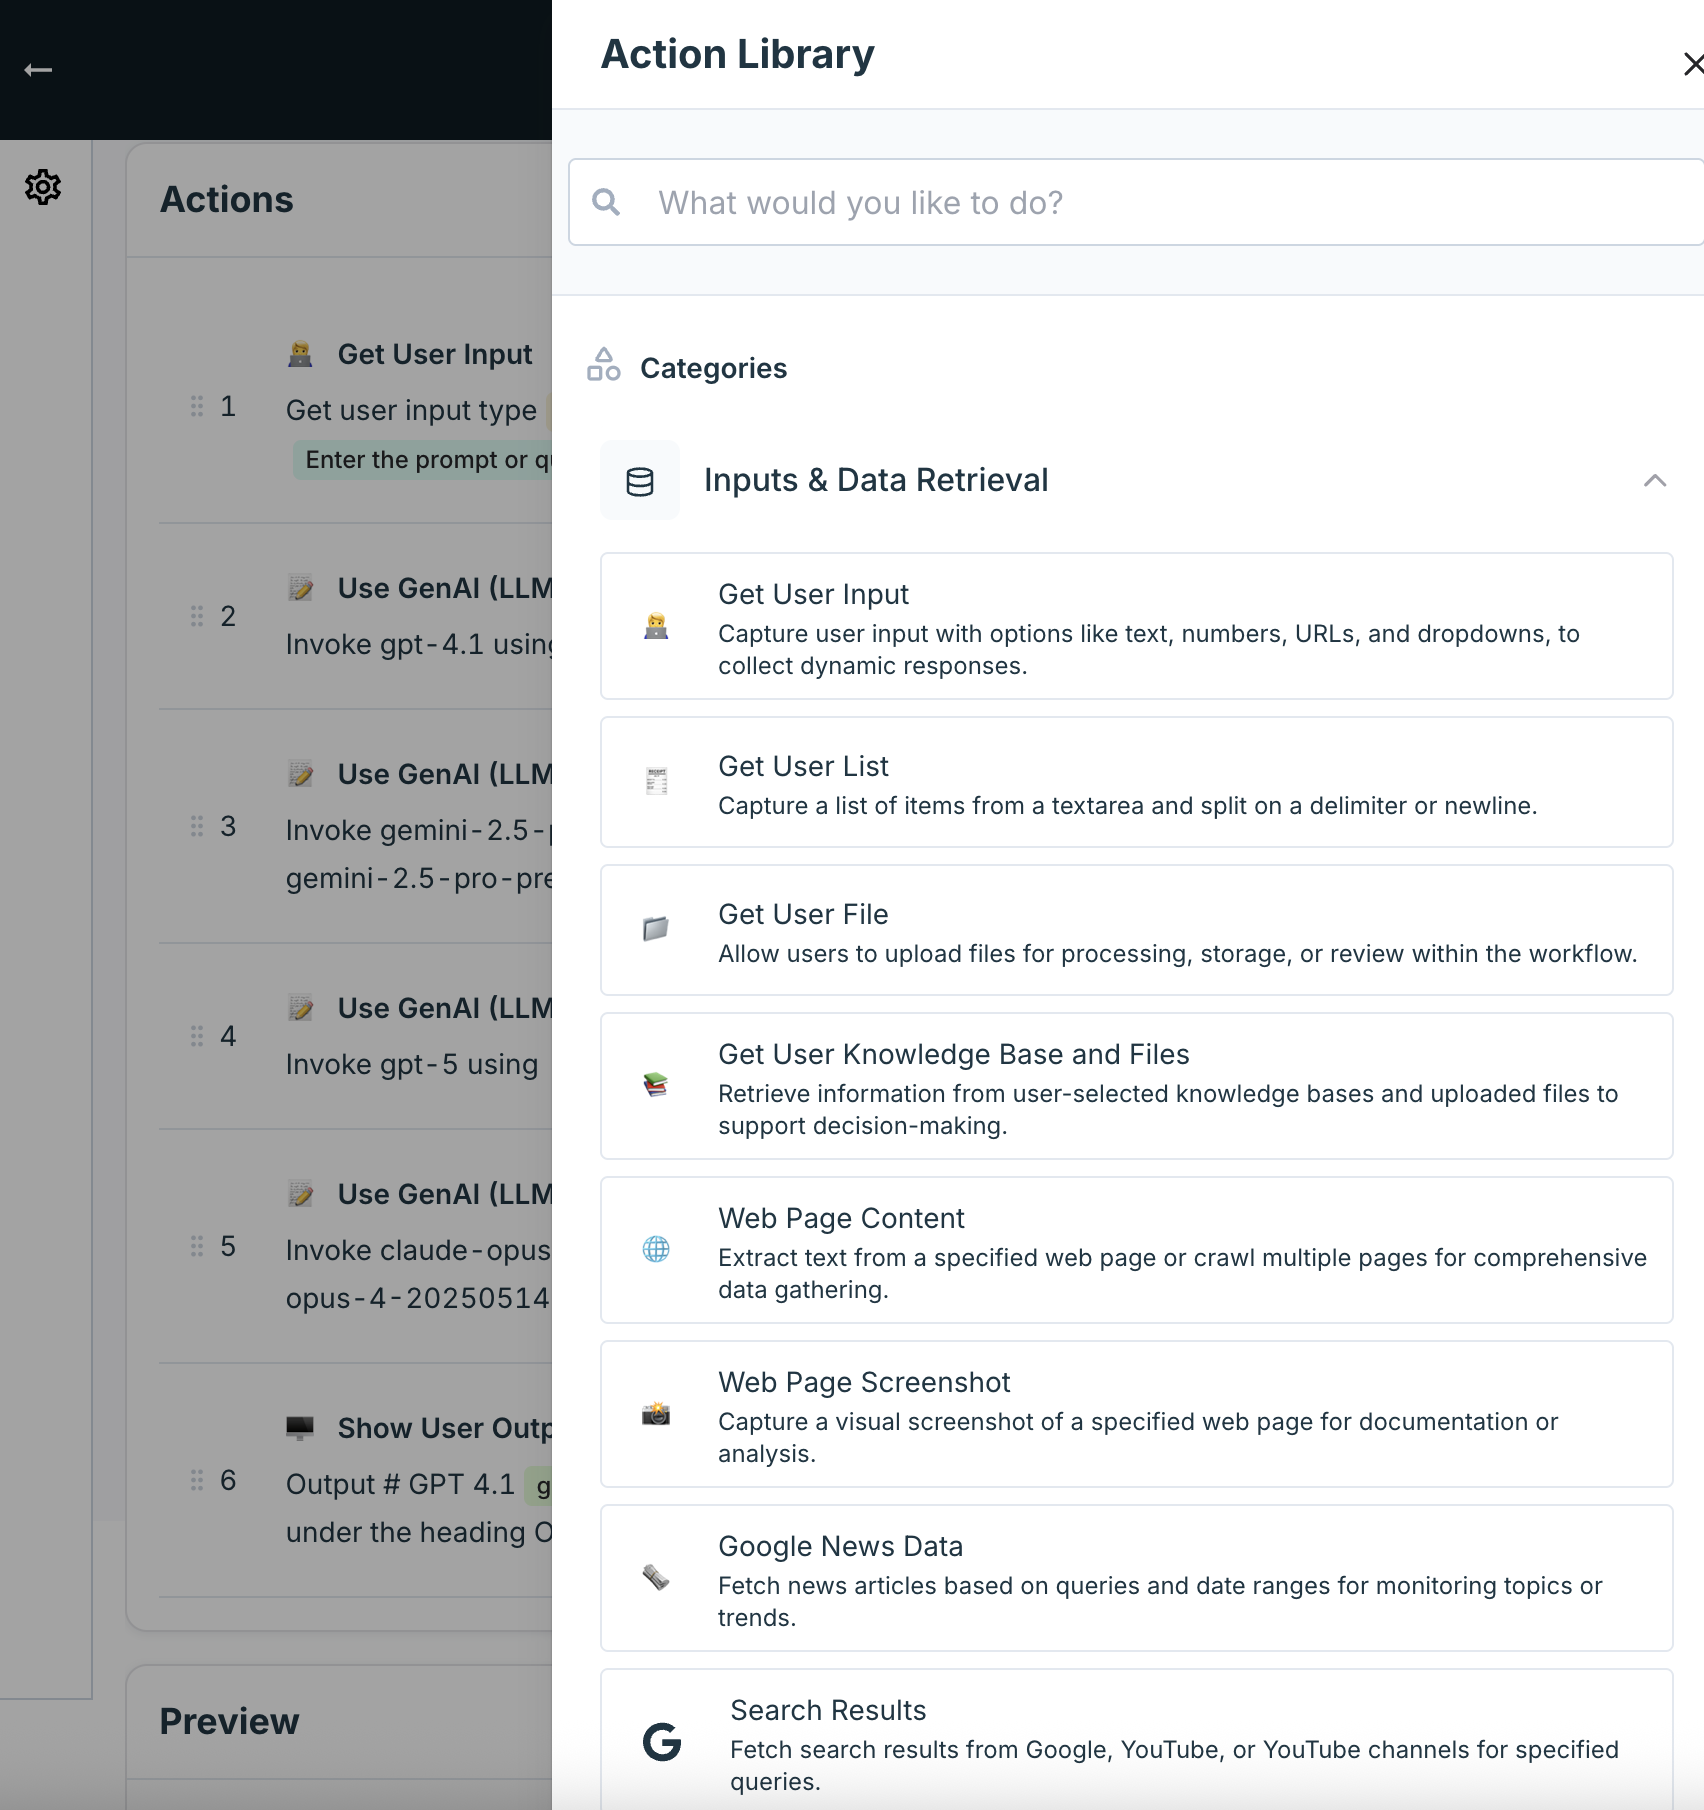
Not sure where to find an action? You can search in the action library too!
Agent Preview Panel
The “Preview” panel is an essential tool for testing and debugging your agent as you build. It allows you to see how your agent will run, inspect its data at every step, and quickly iterate on your design.Running your agent
To start a preview, simply add an action that requires user input (like “Get User Input”) and fill in the required fields. The agent will automatically run up to that first input step. From there, you can continue the run step-by-step.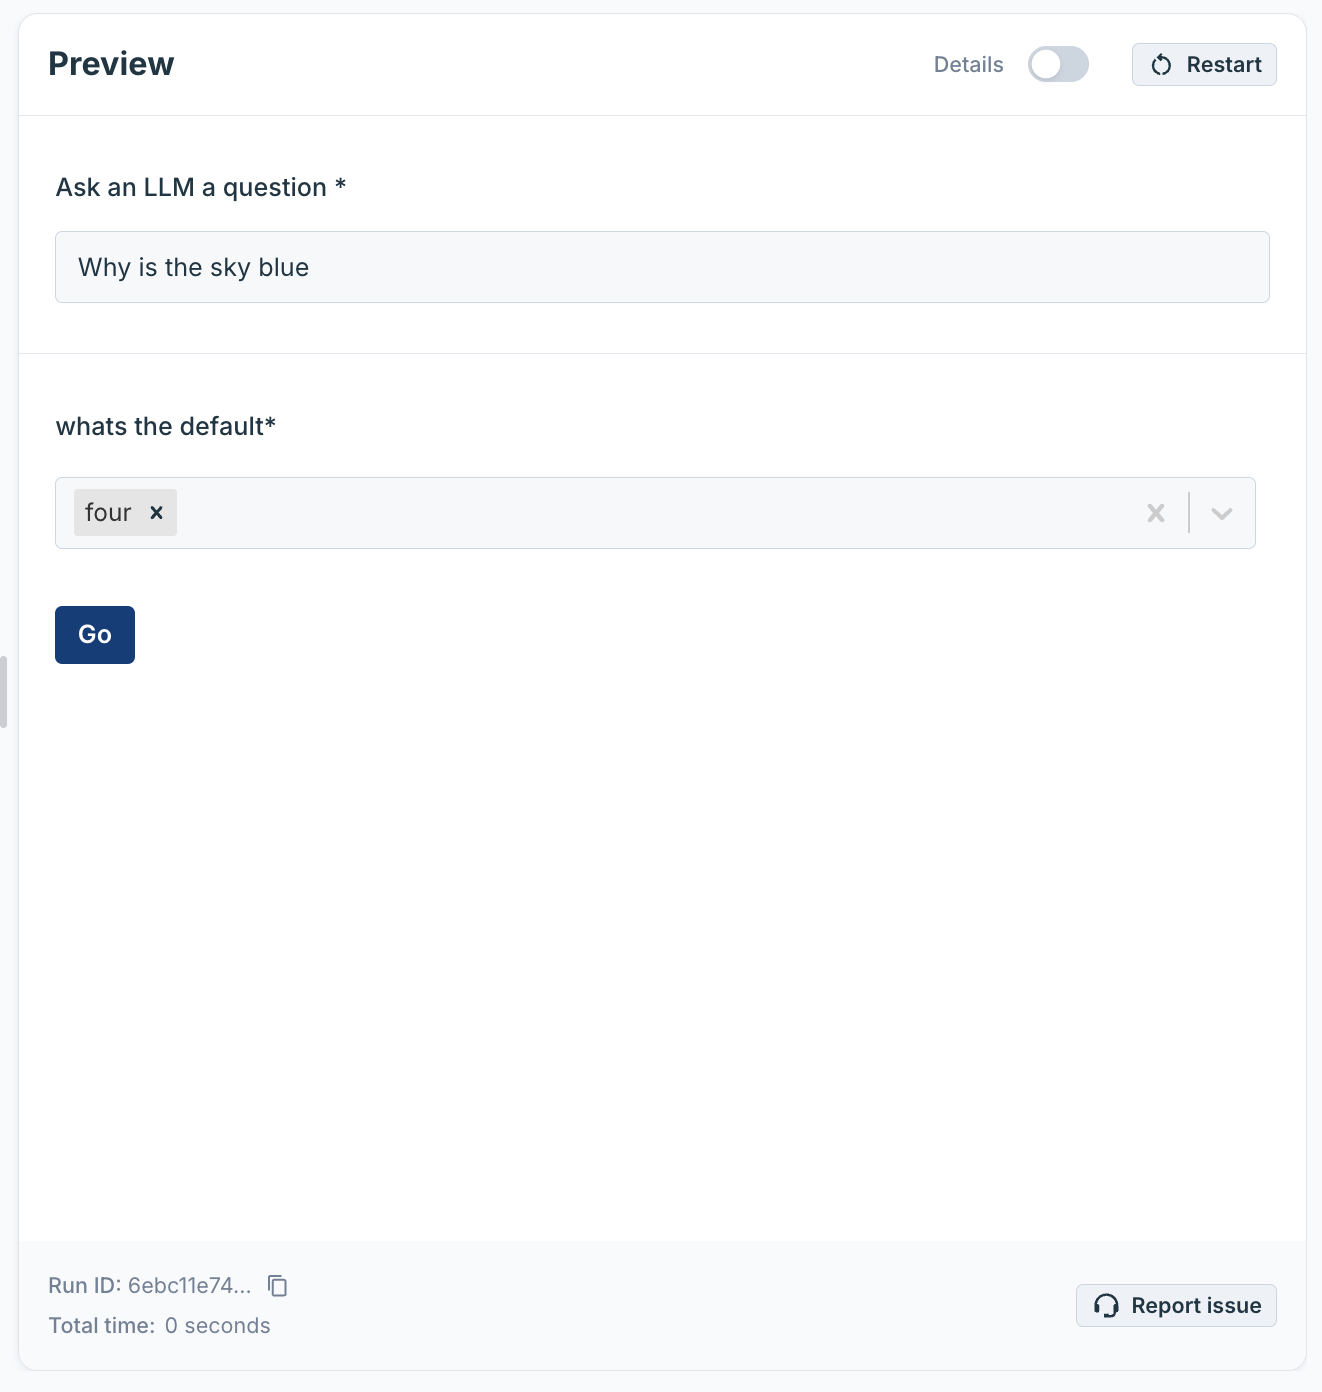
Details Toggle
The “Details” toggle at the top of the panel allows you to switch between two views:- Simple View (Details Off): This view shows you the inputs and outputs of your agent, just as a user would see them. It’s great for testing the overall user experience.
- Detailed View (Details On): This view provides a step-by-step log of your agent’s execution. It’s an essential tool for debugging, as it allows you to see the inner workings of your agent.
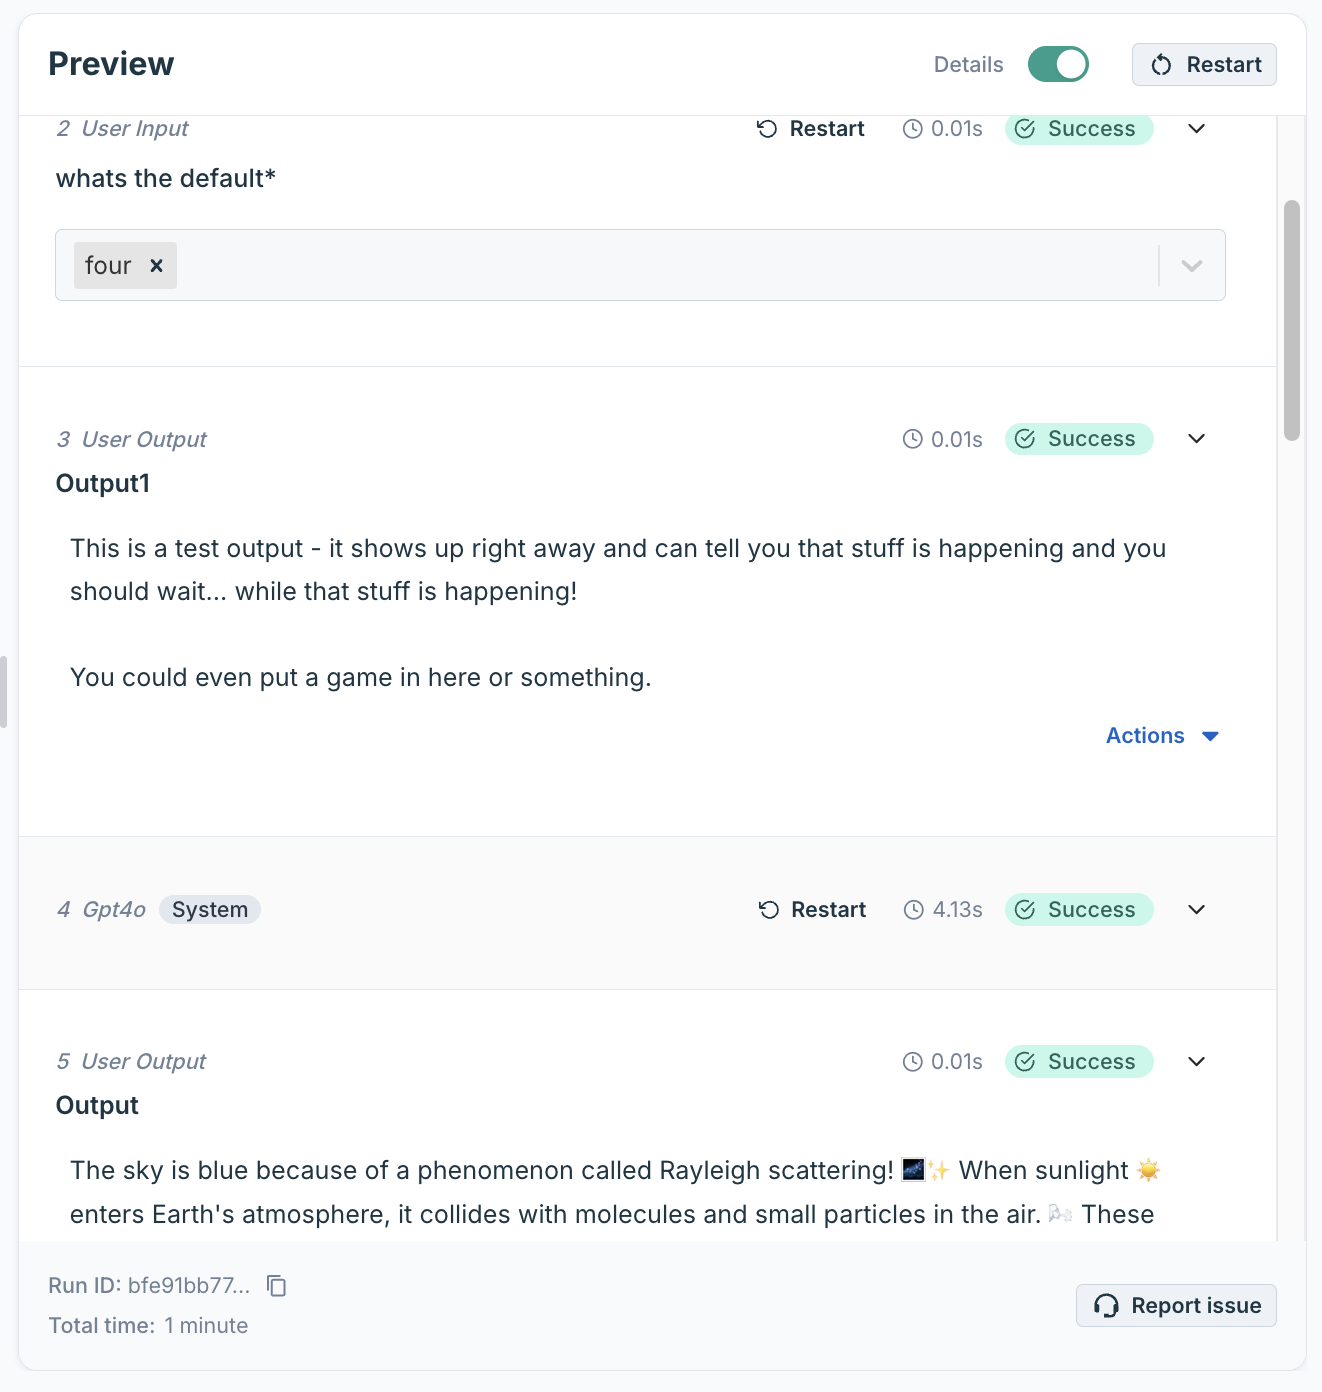
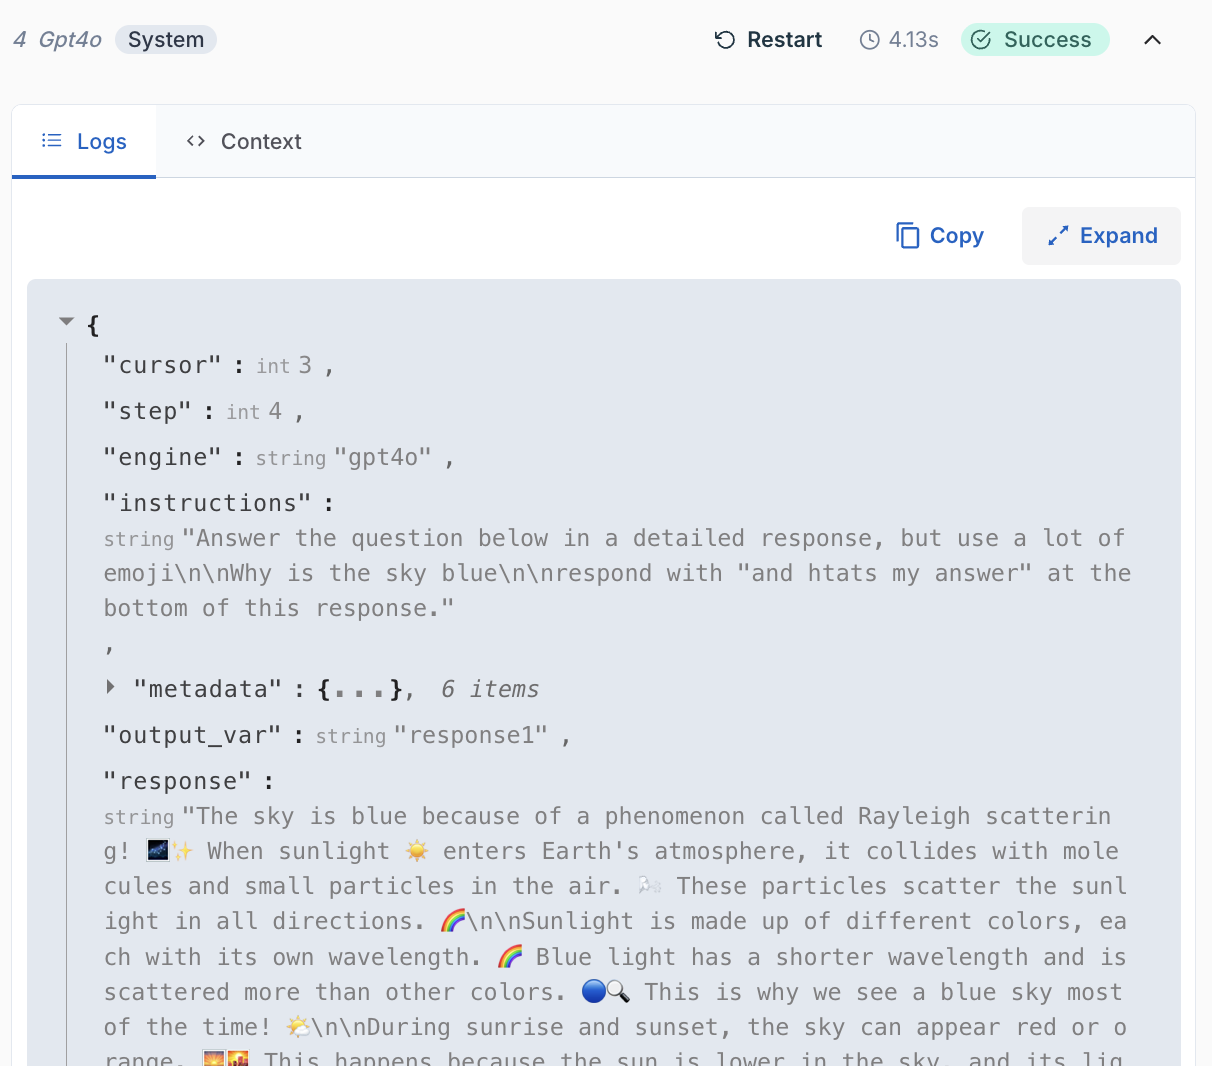
- Log: This section provides a summary of what happened during the step. It will show you the action that was run, whether it was successful, and how long it took.
- Context: This section shows you the state of all the variables in your agent after the step was completed. This is incredibly useful for debugging, as you can see exactly what data the agent was working with at any given point.
Restarting and rerunning steps
The Preview panel makes it easy to iterate on your agent’s design without having to start from scratch every time.-
**Restarting the Entire run: **
Clicking the “Restart” button at the top of the panel will completely reset the agent’s run. This is useful when you want to test your agent from the very beginning with new inputs. -
**Restarting from a specific step: **
The builder is smart enough to know when you’ve made a change to your agent’s workflow. When you modify an action, the agent will automatically restart the run from the step you changed. This allows you to quickly test your changes without having to rerun the entire agent. For example, if you have a 10-step agent and you modify step 5, the agent will preserve the results of steps 1-4 and restart the run from step 5. This is a huge time-saver when you’re building complex agents.
